If you’re struggling to locate those last few jigsaw puzzle pieces in We Were Here Tomorrow, you’re not alone. There are 12 pieces you need to gather across locations like the Common Room and the Research & Development area to complete the puzzle. Let’s make sure you get them all!
All the piece locations are laid out here in the order you should grab them. Just a heads-up: when you’re searching around the area before the funicular, make sure you don’t pull the wrong lever or you’ll lock yourself out of returning to the Common Room.
All 12 Jigsaw Puzzle Piece Locations
Pieces #1–3: Common Room
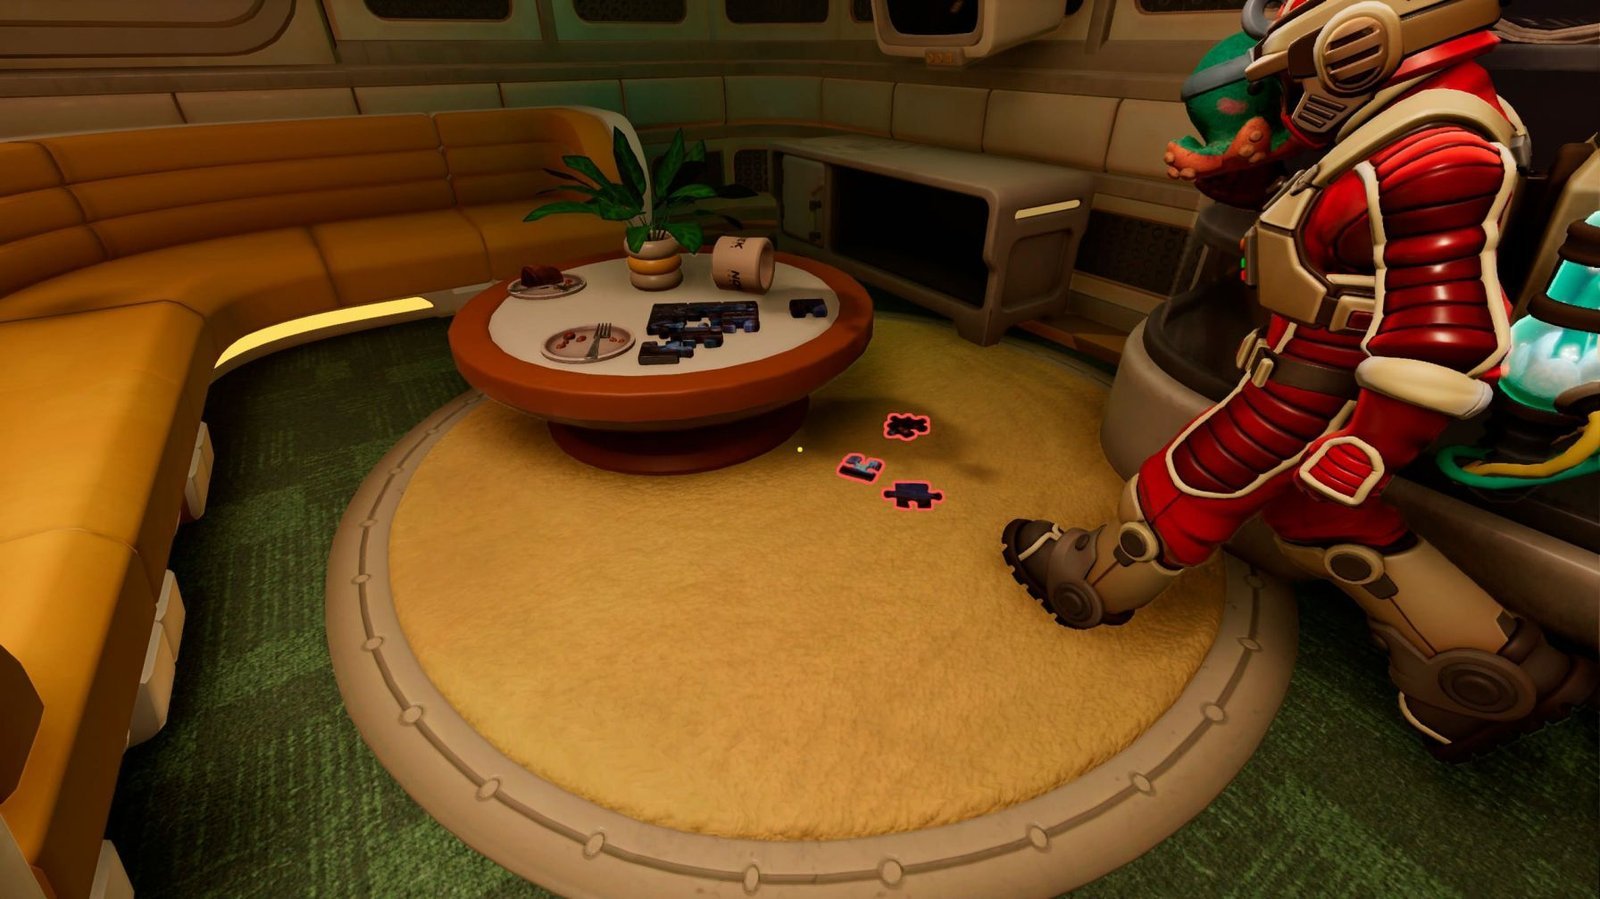
The first three jigsaw pieces are hiding under a small table with an unfinished puzzle in the Common Room, also known as the Hub.
Check the right side below the table to collect all three pieces before moving on to the next spot.
Piece #4: Common Room
Chill out in the cozy Common Room and make your way over to that inviting dining table filled with delicious cakes. It’s the perfect spot to start your adventure!
Take a closer look beside the array of test tubes and that trusty notepad resting on the table. You’ll discover the fourth jigsaw puzzle piece tucked away right there, waiting for you to find it!
Piece #5: Research & Development
Step into the intriguing Research & Development area, which is that two-story room showcasing two key card slots that lead you towards the elusive Prototype Room. It’s quite a sight to behold!
Make your way beneath the second floor and examine the laboratory counter just to the right of the entrance. Keep your eyes peeled—you’ll spot Piece #5 sitting casually near a mug on this counter, just waiting to be collected!
Piece #6: Research & Development
Hang around in the Research & Development room for a bit and venture up to the second floor. There’s a lot more to discover up there!
Seek out a small cabinet that’s tucked away to the left of the stairs. When you check inside, you’ll get to snag the sixth puzzle piece. Happy hunting!
Piece #7: Prototype Room
Your adventure takes you to the Prototype Room, where the seventh jigsaw puzzle piece is just chilling on the left ceiling fan, waiting for you to snag it!
You’ve got options to reach that piece! Either hop on the elevator to glide up to the first platform, or show off your parkour skills by climbing up yourself. If you have a buddy who’s carrying the hook, they can pluck the piece right from the fan without needing to slow it down at all!
If you’re rocking the cube character, you can definitely block the fan first to make things easier, but honestly, it’s not a must. You can still snag that piece without any extra steps!
Piece #8: Outside the Prototype Tutorial Room
After you’ve wrapped up the Prototype tutorial, don’t forget to head into the small room nearby. Here, you and your partner can work together to pull the lever—teamwork makes the dream work, right?
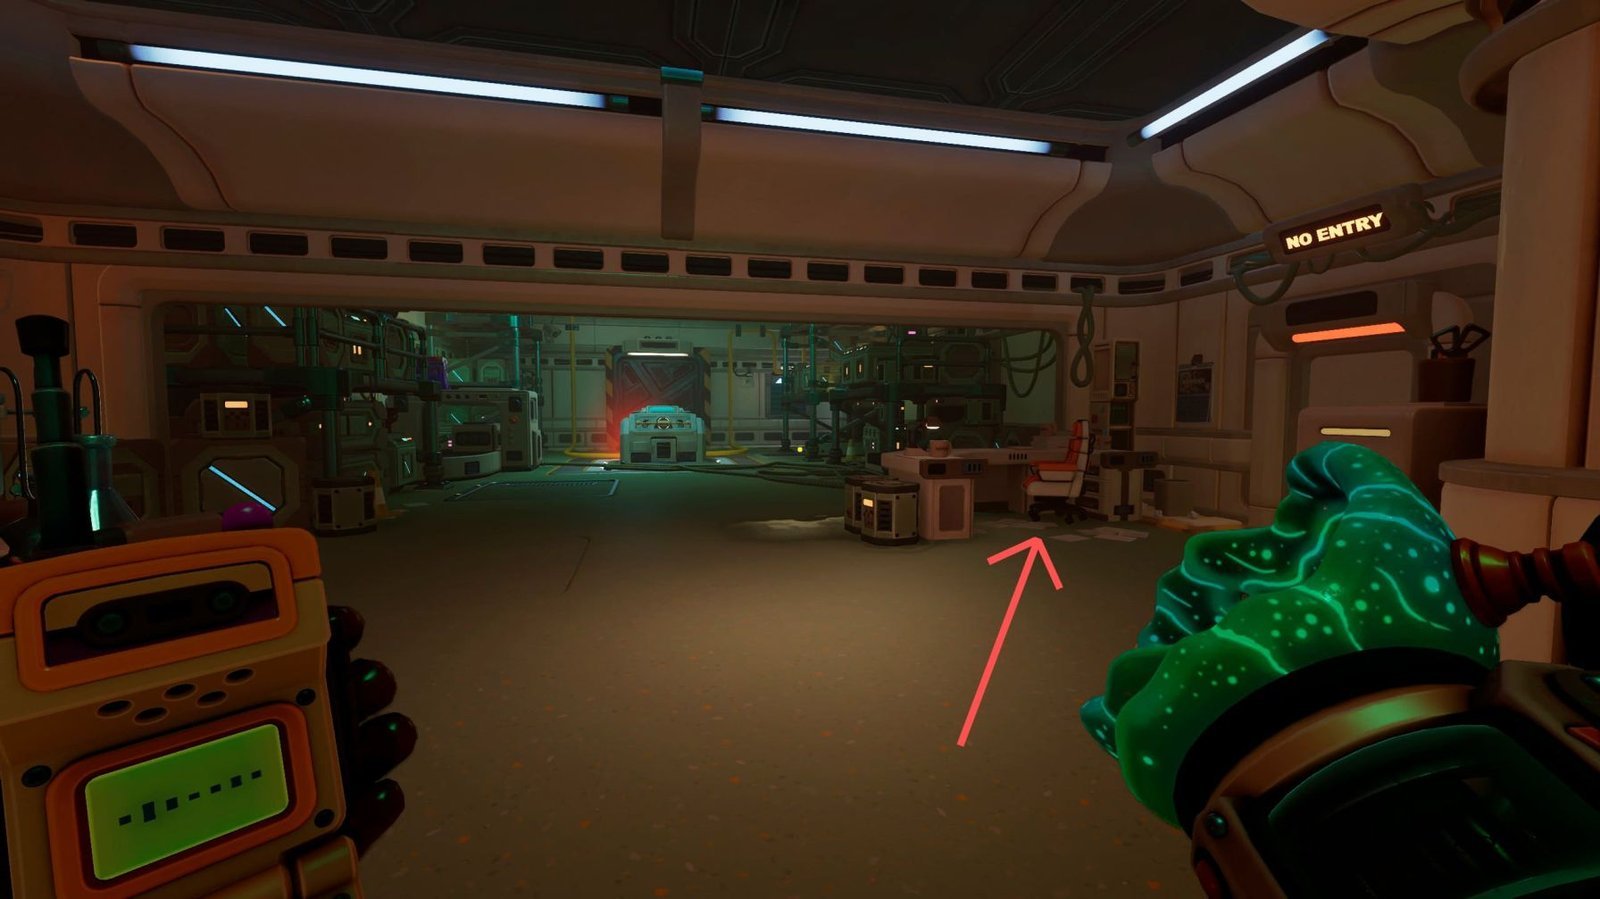
As soon as the door slides open, make your way out and take a peek at the table to your right as you exit. You’ll find the eighth puzzle piece sitting there, just waiting for you to pick it up!
Piece #9: Stairs Leading Back to the Common Room
After you’ve snagged Piece #8, make sure to head through the door located to the left of that table and climb those stairs to continue your quest!
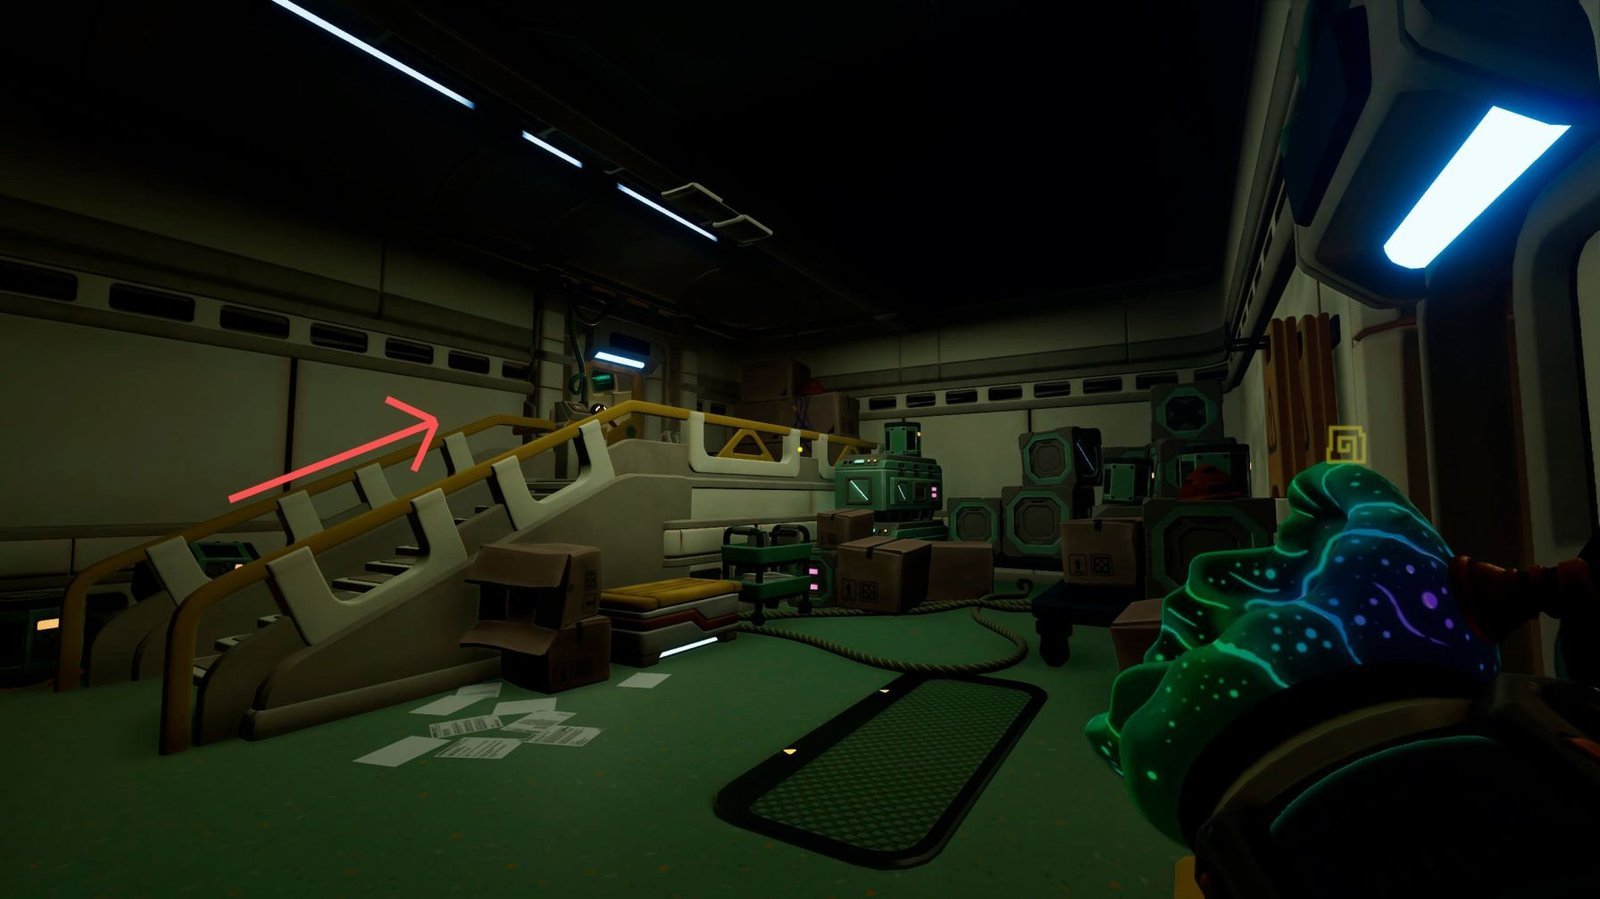
It’s time to dive into a little treasure hunt! Over on the right side of the gate, you’ll spot a cluster of boxes eager to be explored. Keep your eyes peeled for one sporting a bright red hat perched atop it. And don’t forget to check right next to the hard hat—you’ll uncover another puzzle piece chilling there, ready for you to snag!
Piece #10: Room Before the Funicular
Listen closely now—steer clear of that dual-handled lever sitting right in the center of the room! If you happen to give it a pull, you’ll end up sealing off the door that takes you back to the Common Room, and we all know you need to be there to work on your jigsaw puzzle. So, keep your hands off that lever for now!
Alright, adventurer, it’s time to ascend to the second floor! Check out the handy image below that shows you the way up. Generally, all you need to do is leap on the various items around you, and before you know it, you’ll find yourself in that coveted room. Let’s boogie on up!
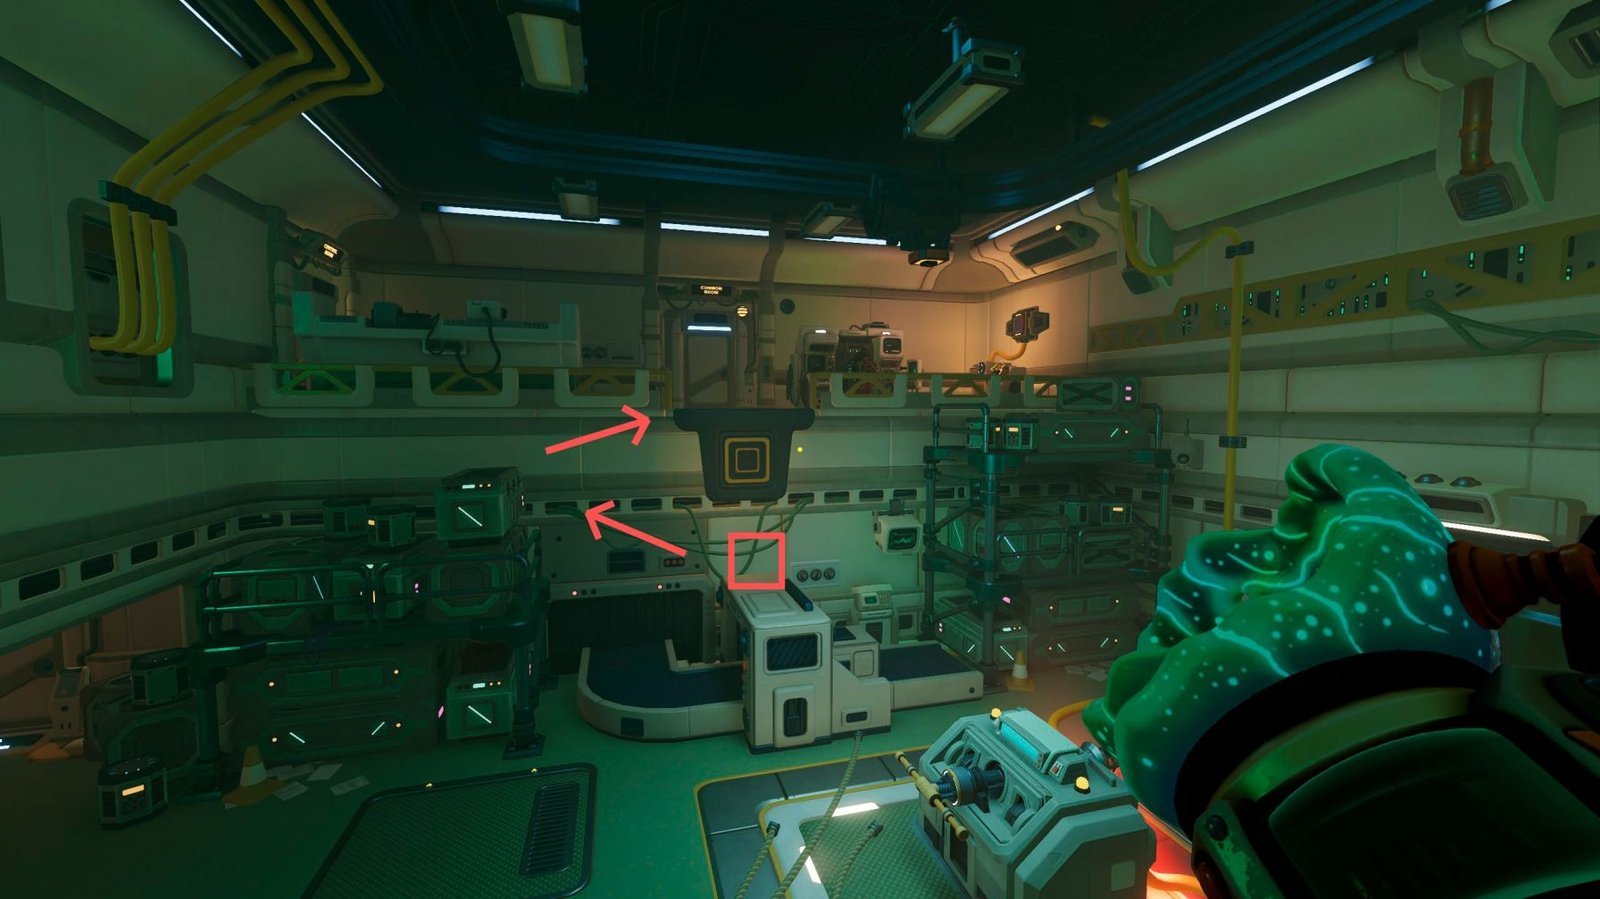
As soon as you reach the second floor, take a moment to glance to your left. There, in front of the locked Control Room, is a sleek computer panel just waiting for your attention. Your next treasure, the tenth puzzle piece, is cleverly perched right on top of that panel. Go ahead and grab it—you’ve earned it!
Piece #11: Common Room Balcony
From the very same floor where you just discovered Piece #10, head through the door that leads to the balcony of the Common Room. It’s time to stretch those legs a bit and see what treasures await you outside!
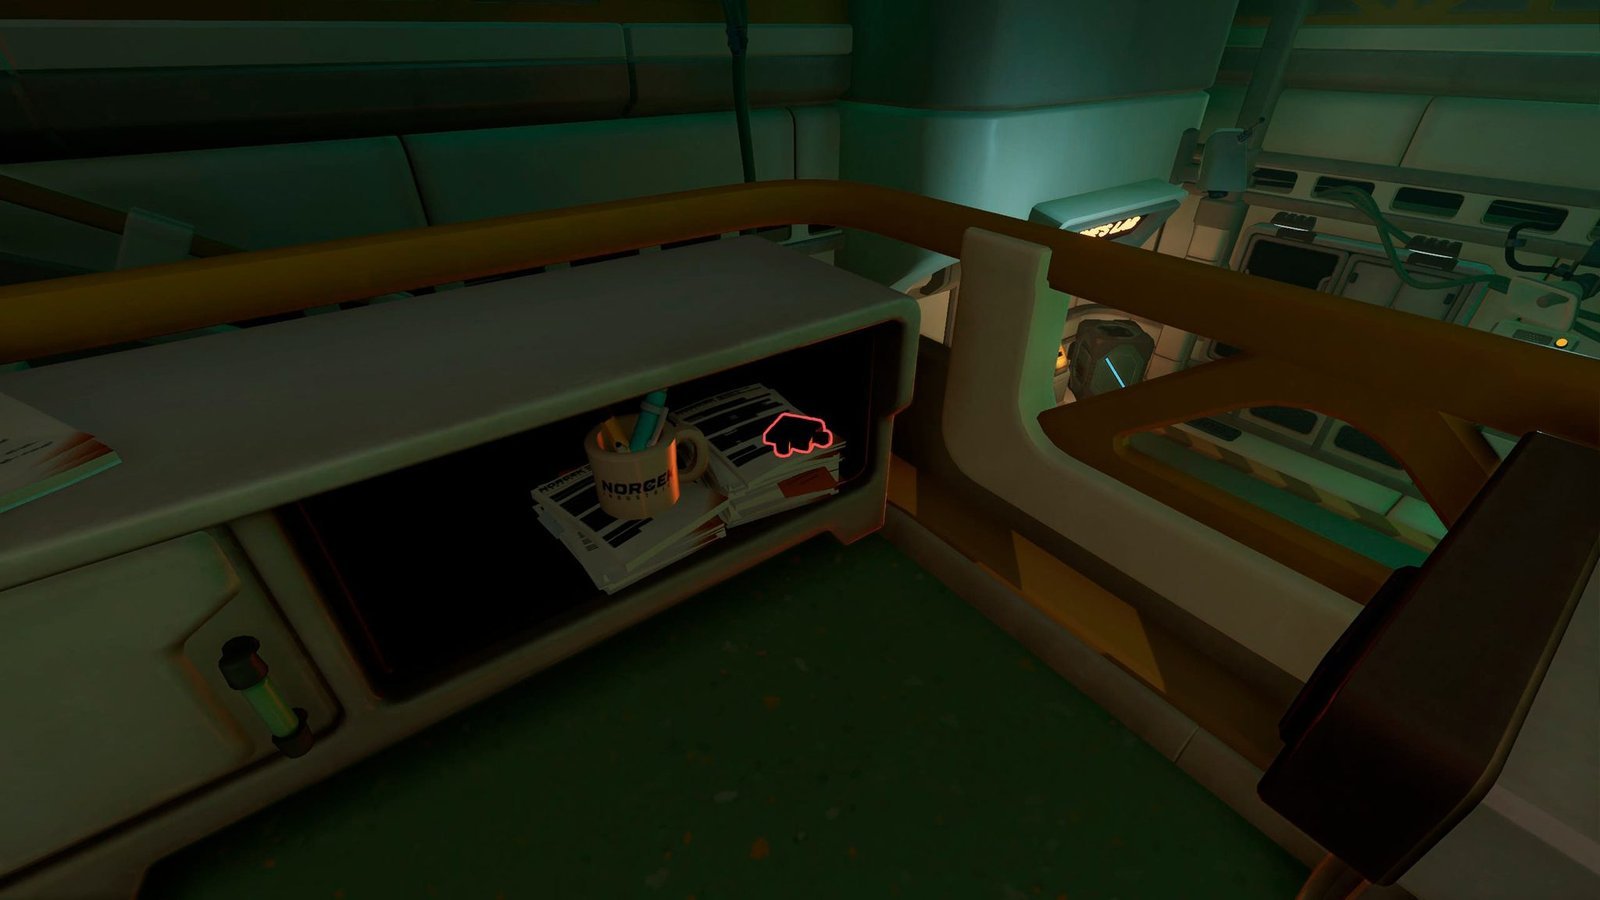
Now, once you’re on that balcony, turn your gaze to the right. You’ll spot a computer sitting there, with a little green cabinet snugged up next to it on the left side. If you peek inside that last shelf of the cabinet, you’ll find the eleventh puzzle piece waiting just for you. Happy hunting!
Piece #12: Common Room Balcony
Head over to the balcony, then turn your gaze toward the Common Room. Take a moment to look up at the ceiling lights that I’ve indicated in the image below. That’s where you’ll find the final jigsaw puzzle piece waiting for you!
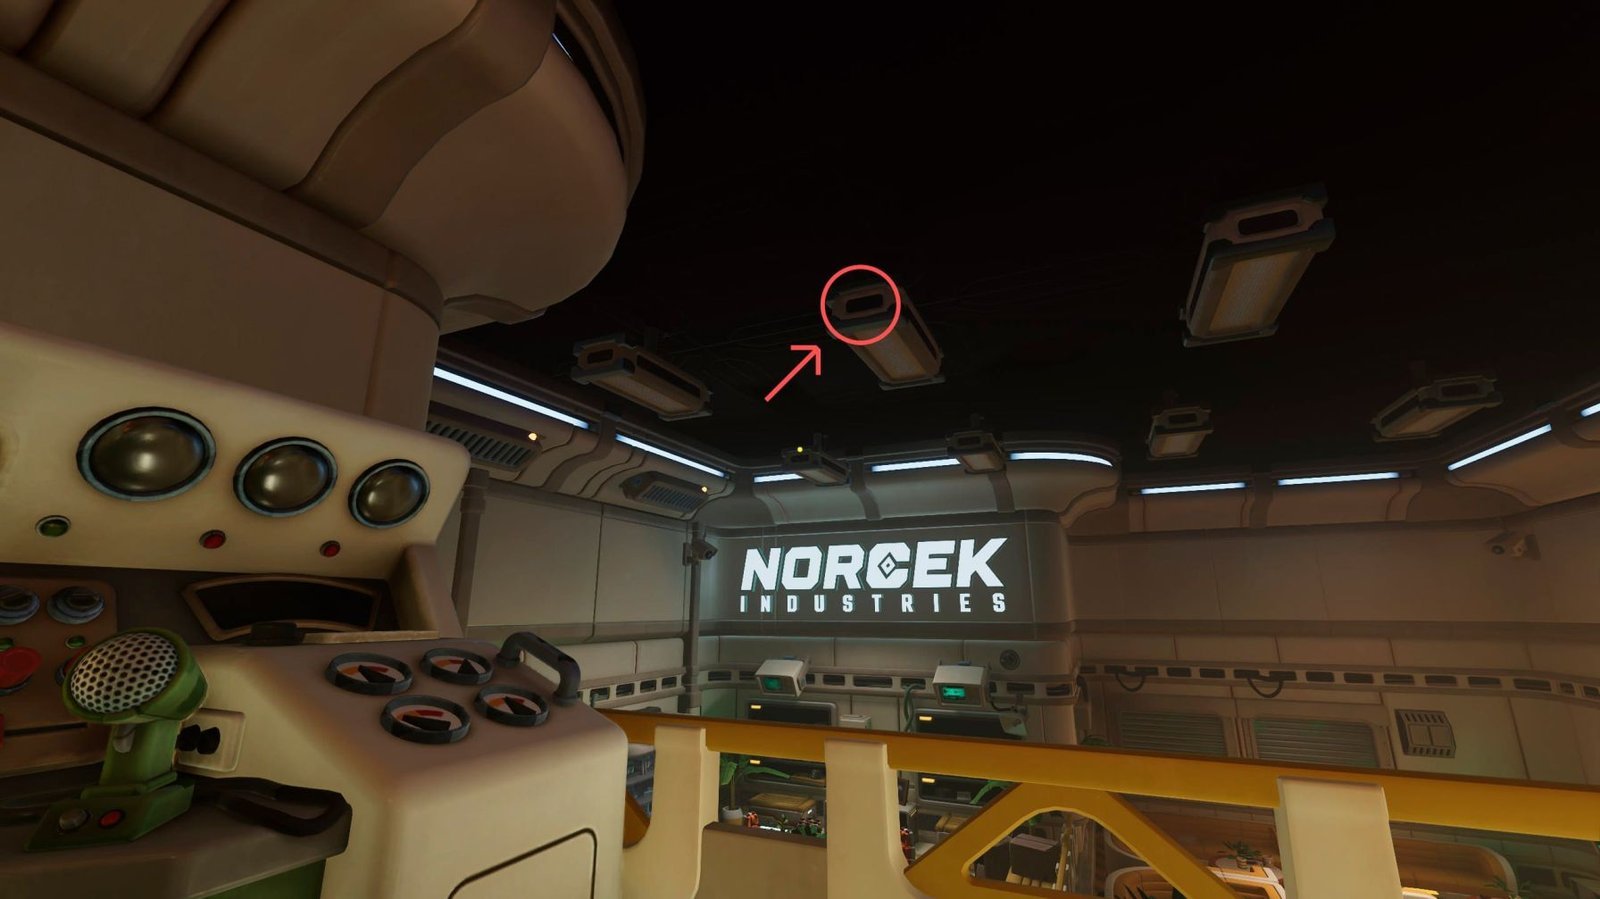
Once you’ve snagged that piece, you’ll have completed your collection of all 12 jigsaw pieces. Hooray! Now you can head back to the jigsaw puzzle in the Common Room and put it all together for the big finish.
A little heads up: While completing the jigsaw puzzle won’t net you any in-game achievements, there’s a delightful little surprise from the developers waiting for you once you finish the puzzle! So, it’s worth your time.
Be sure to check out my other handy solutions for puzzles in this game:
- We Were Here Tomorrow: Cable Puzzle Solution
- We Were Here Tomorrow: Rune Puzzle Solution
- We Were Here Tomorrow: G-46C Puzzle Solution