In Vampy’s Big Day, shadows become your ally while the sun remains a foe. As you navigate the game, using Solea’s powers to shift the sun is essential for creating paths and exploring hidden areas. Amidst these dark routes, you’ll stumble upon gnomes tucked away in various locations.
You’ll definitely want to find all the gnomes, but it can be tricky. Many are cleverly hidden behind objects, nestled in bushes, or along less visible routes marked by darker grass or shadows. This article lays out all 17 gnome locations in Vampy’s Big Day across Levels 1–6, complete with instructions to help you uncover each one.
All Gnome Locations in Vampy’s Big Day
Level 1 – Gnome Location
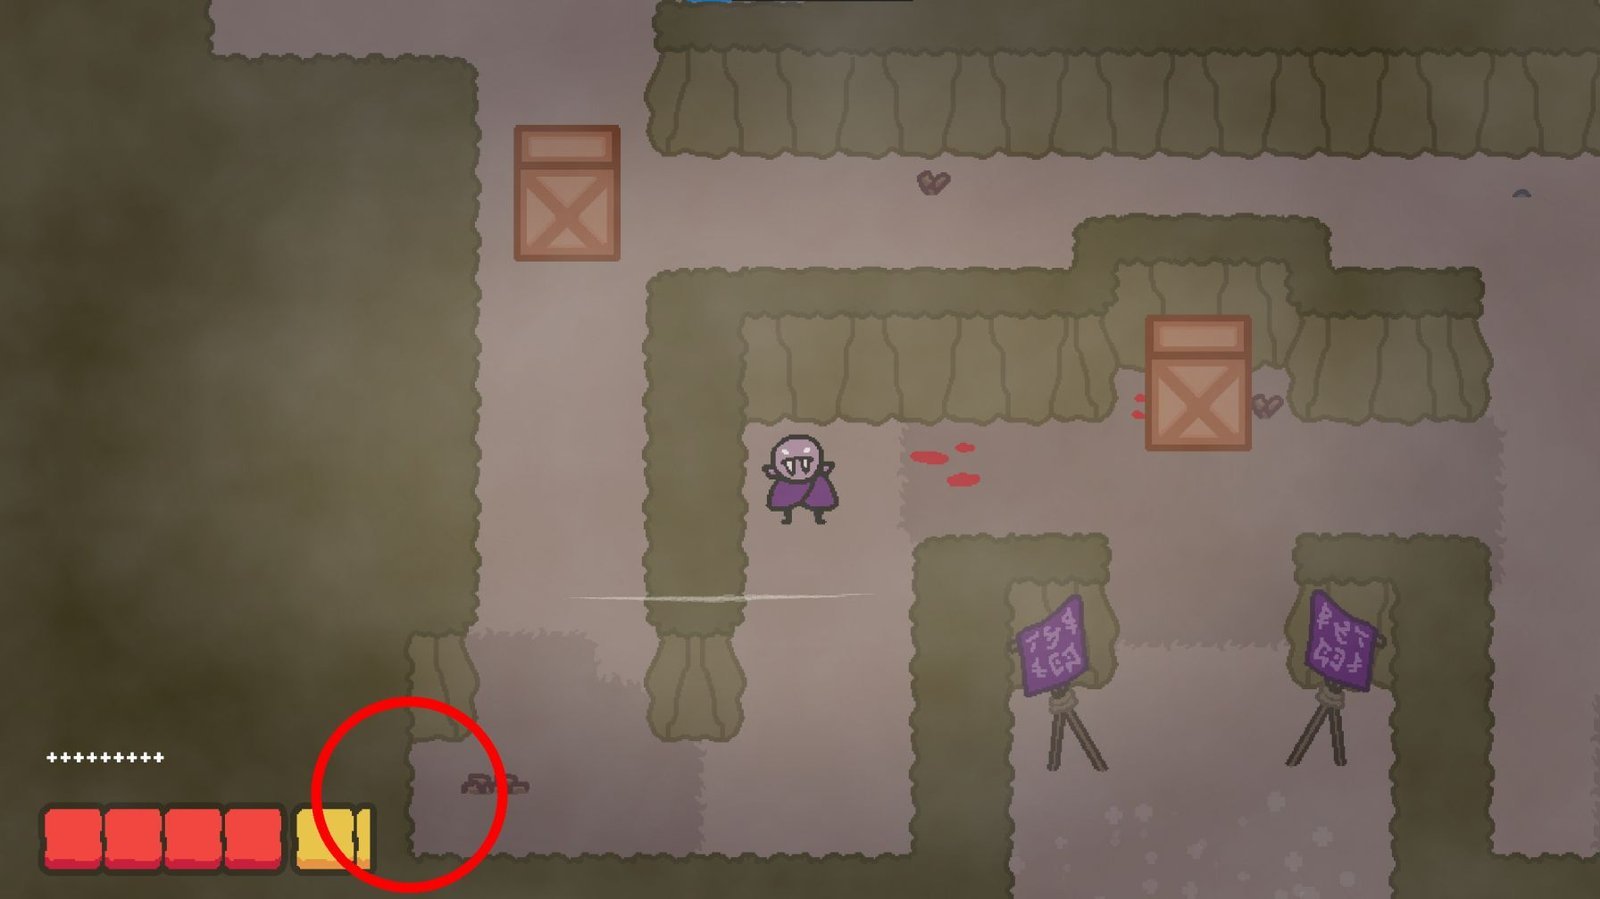
The very first gnome can be located in the expansive village area where you meet the initial guard.
Keep an eye on the lower-left corner of this area. The gnome is easily visible, so there’s no need to go searching for a hidden trail.
Level 2 – All 5 Gnome Locations
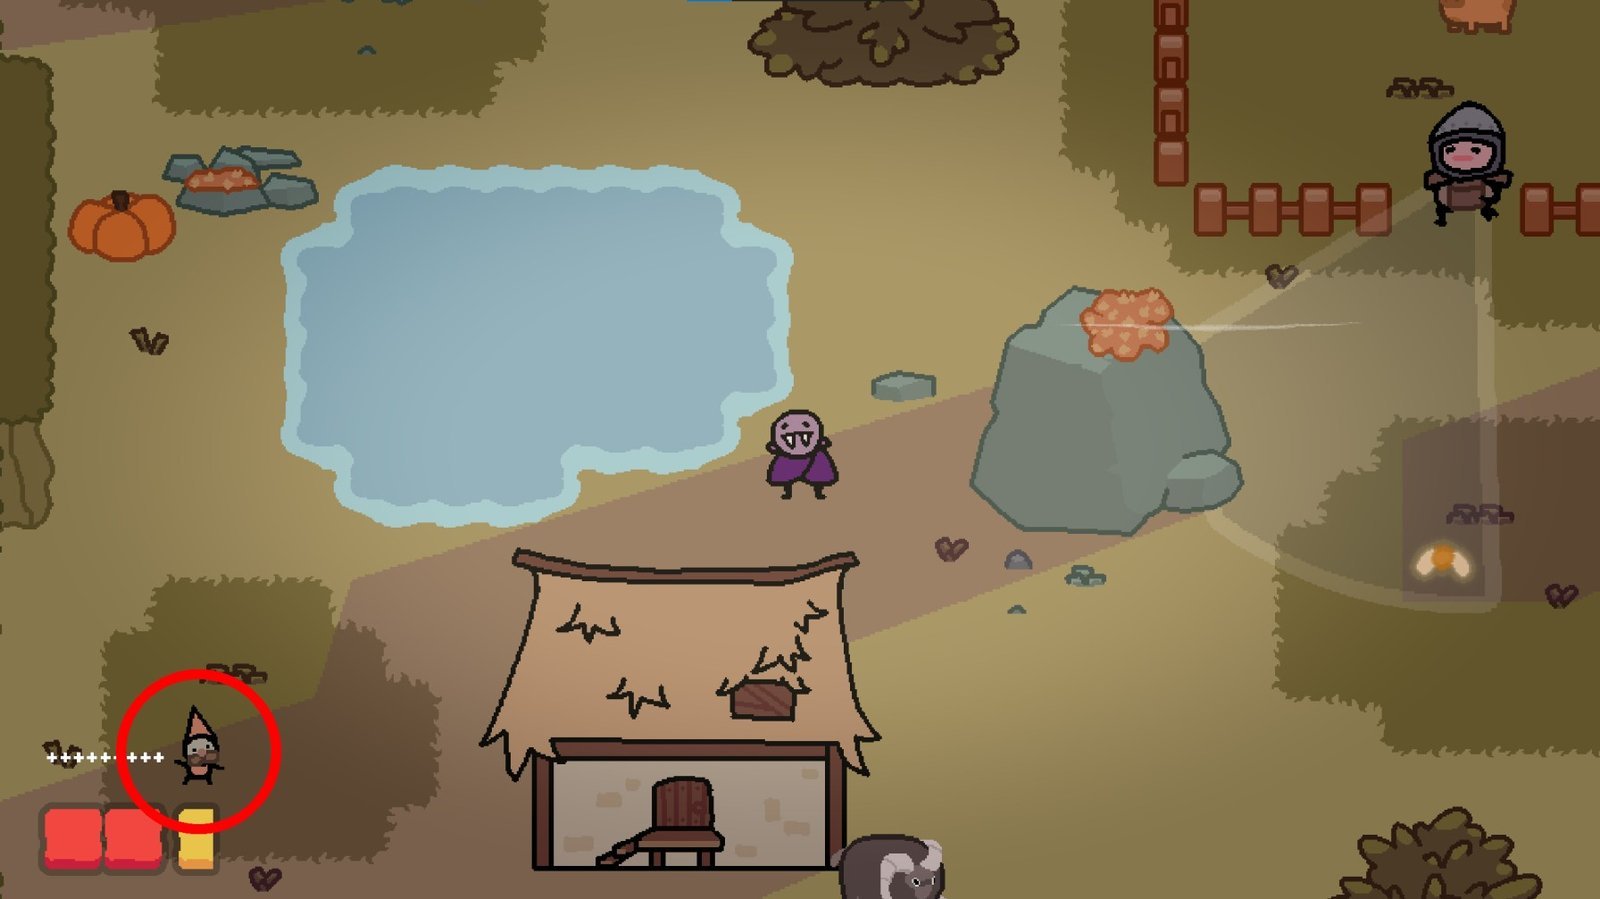
Level 2 contains a total of five gnomes for you to find.
Gnome 1: Hidden Path Near Barnaby
Now search for a concealed path leading to the left. Follow this route to discover your first gnome.
Alright, let’s embark on a little adventure! You’ll want to keep your eyes peeled for a sneaky path that veers off to the left. Follow this hidden route, and you’ll be rewarded with your first gnome encounter – it’s like a treasure hunt waiting to happen!
Gnome 2: Last Room on the Left Path
Look for a small shadow on the wall, indicating a hidden passage. Go through it to find the second gnome.
As you explore, don’t forget to check the wall for a tiny shadow cast by a hidden passage waiting to be discovered. Take a moment to wander through this mysterious route, and you’ll soon find yourself face-to-face with the second gnome. It’s all about those little details!
Gnome 3: Hidden Path After the River
Search the right wall for a small shadow, which signifies the beginning of a secret path that leads to the third gnome.
Section: Gnome 3: Hidden Path After the River. Nearby text: Look along the right wall for a small shadow. It marks the entrance to a secret path that goes to the third gnome.
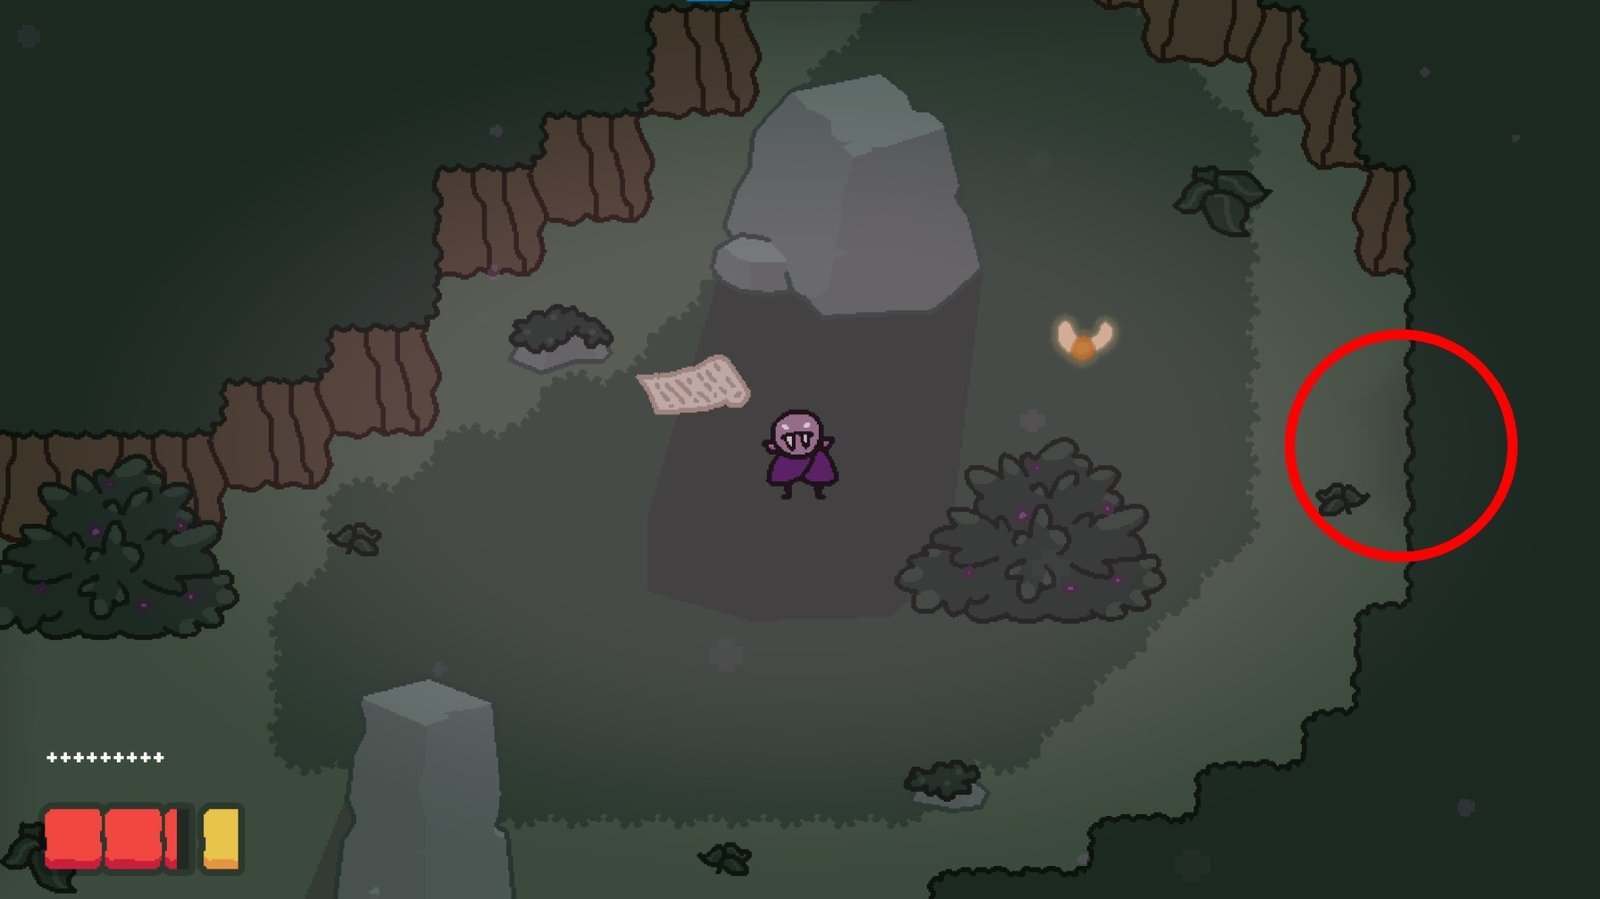
Gnome 4: Room With the Rope
Gnome 5: Behind the Wall After Getting the Key
After Barnaby hands you the key, unlock the door and head to the upper-right area.
Look for a notch in the wall; a concealed passage lies within that area leading to the fifth gnome.
Gnome 5: Behind the Wall After Getting the Key
Important: If you go down the evil path, make sure to collect this gnome before finishing off Barnaby, or you’ll end the level prematurely. If you accidentally defeat him or complete the level without obtaining this gnome, hit Alt + F4 on the results screen to exit and retrieve the missed gnome.
Next up, keep your focus sharp for a noticeable dent in the wall. This little indentation hides a secret passage that will guide you straight to the fifth gnome. Just think of the joy when you uncover yet another gnome amidst your journey!
Heads up: If you’re taking the darker path in this game, be extra cautious not to eliminate Barnaby before you grab this gnome. Doing so could abruptly cut off your adventure at this level! If things go sideways and you end up taking him out or finishing the level without that gnome, you can rescue your mistake by hitting Alt + F4 on the results screen to exit. Don’t miss out on this little guy!
Level 3 – All 3 Gnome Locations
Gnome 1: Secret Path While Following the Spy
Search for an indentation in the wall surrounded by darker grass. Enter this hidden pathway to collect the first gnome.
Keep your eyes alert for a dent in the wall, especially one that’s surrounded by slightly darker patches of grass. Once you spot it, dive into the hidden path, and you’ll snag yourself the first gnome. It’s all about the hunt, and this gnome is just waiting for you!
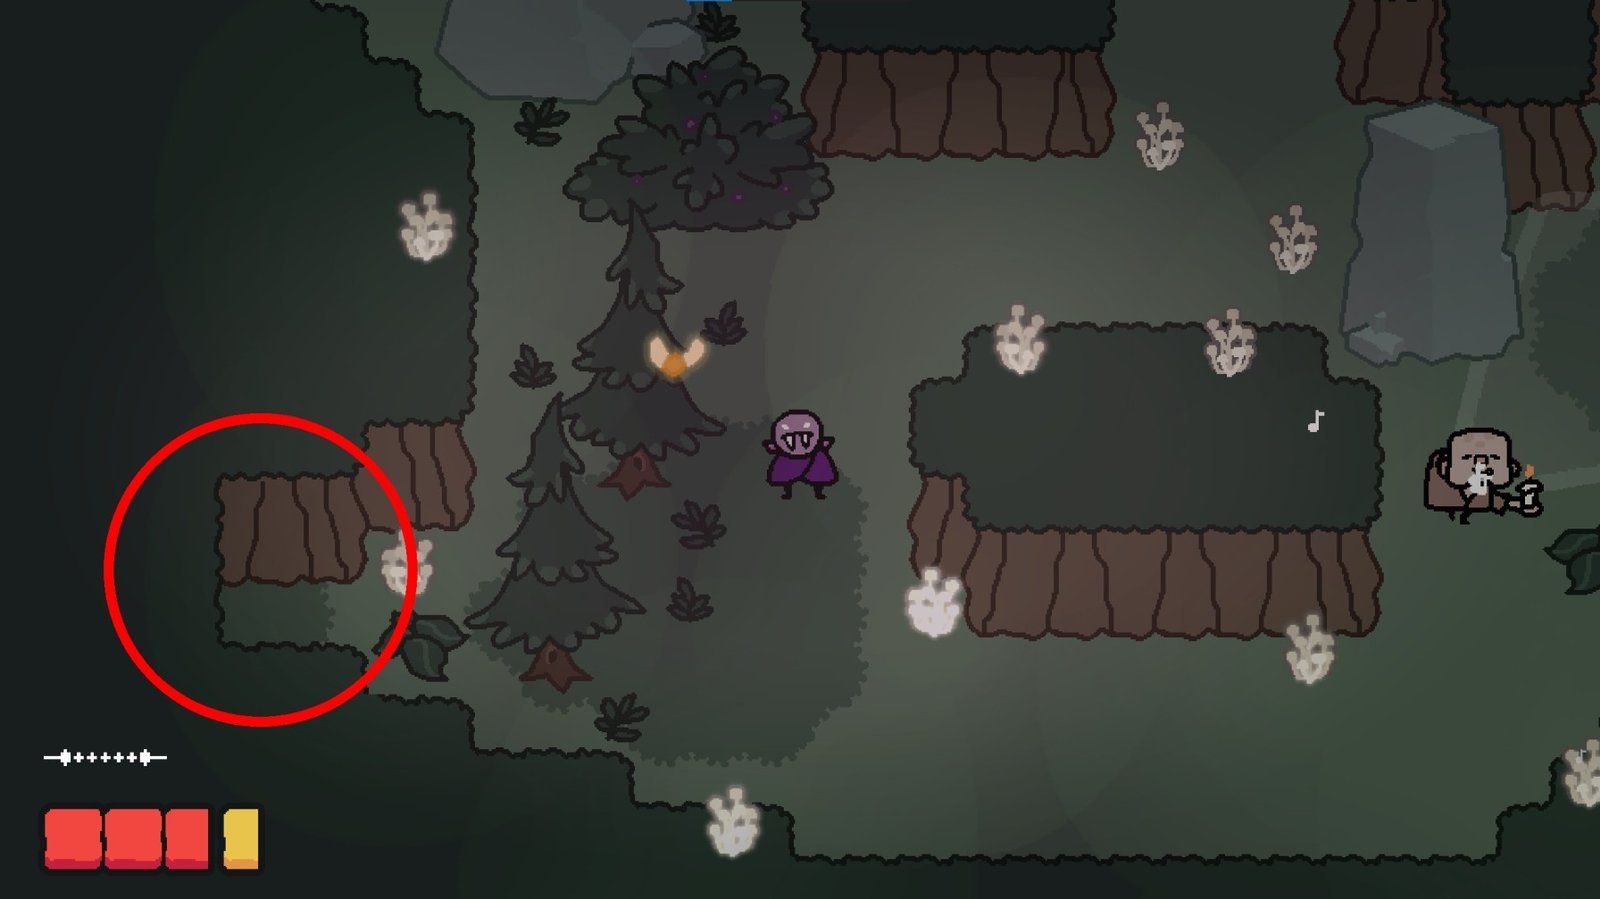
Gnome 2: Hidden Hushroom Near the River
Look above that grub to find another hushroom. Use it to reach the second gnome.
Now, take a glance up above that grub creature. There, perched high, is another hushroom, just beckoning to be used! If you bounce off this hushroom, it’ll elevate you directly to the second gnome. It’s a clever little jump that offers you more than just a view!
Finding this hushroom can be easier if you use the bite mechanic, as it will produce the most noise. If you accidentally wake a grub while on the pacifist route, stand still until it falls asleep. Grubs are blind and can only detect sound, so avoid moving around to prevent drawing their attention.
Gnome 3: Under the Mushrooms Near the Silver Key
Go underneath the mushrooms from there, and continue along this path to find the third gnome.
Once you make your way past those charming mushrooms, keep on this path, and you’ll arrive at the delightful third gnome waiting for you.
Level 4 – All 4 Gnome Locations
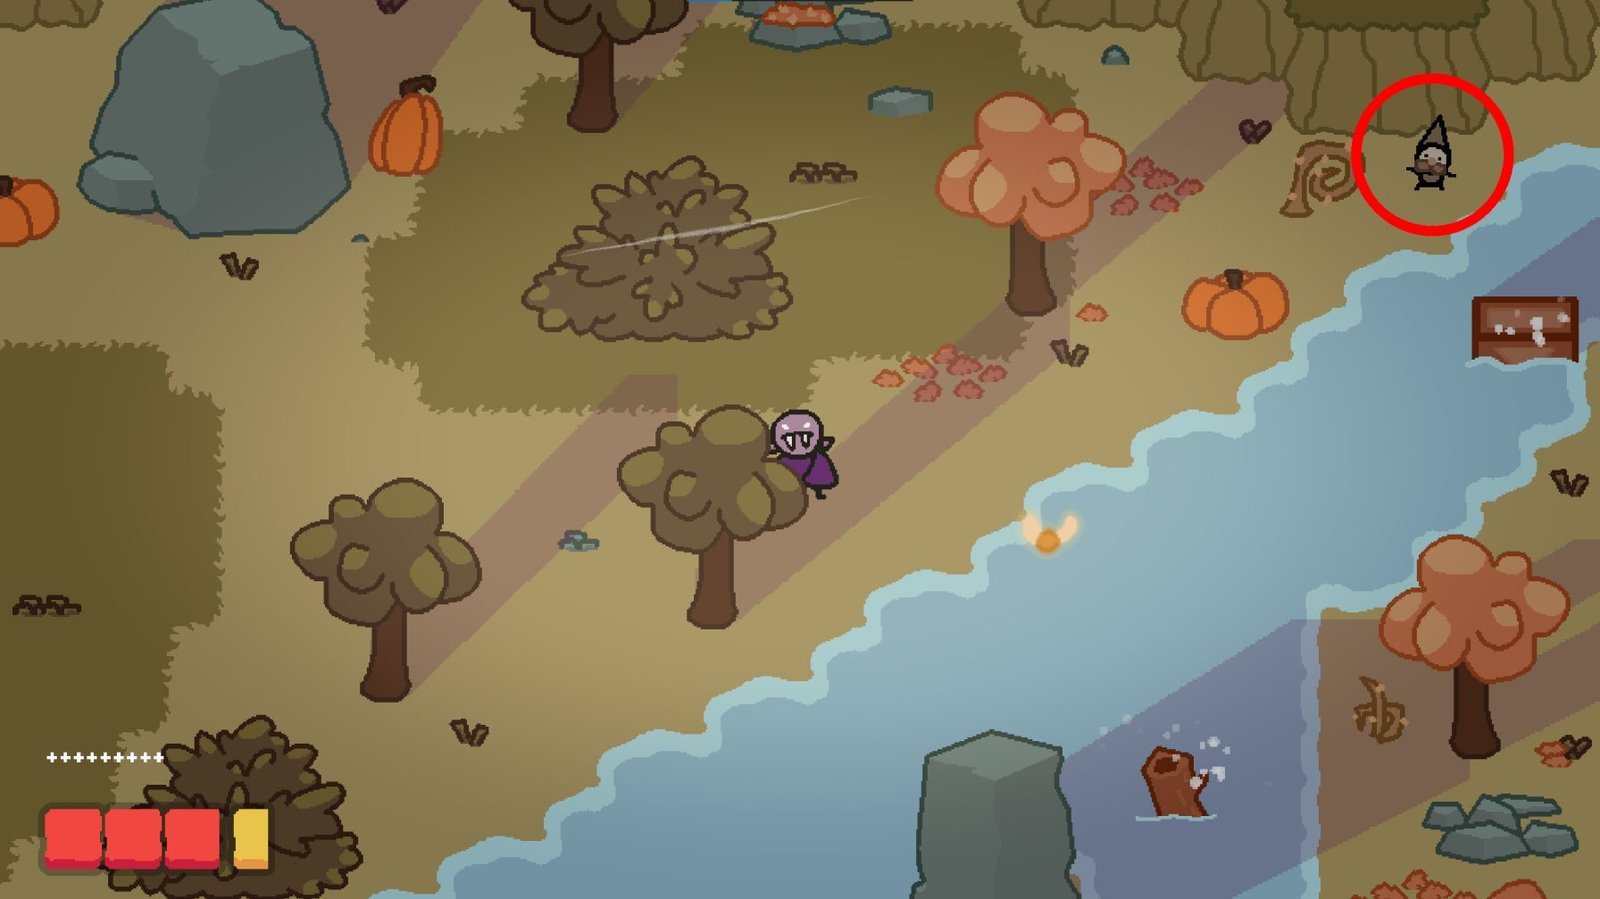
Gnome 1: After Helping Glurk Cross the River
Check the corner near the pumpkin to find your first gnome.
If you take a moment to explore the corner by the pumpkin, you’ll come across our very first gnome, just hanging out and waiting to be discovered.
Gnome 2: Behind the Box in the Helmet Room
Search for a box marked with an X in the room—there are similar boxes, so I’ve highlighted the one to push or pull aside. The second gnome is hiding behind that box.
In the room, start your search for a box marked with an X. There are a few boxes that might look similar, but I’ve highlighted the exact one you need to focus on in the image below. You’ll want to use your strength to either push or pull it away — the second gnome is cleverly tucked away behind this box!
Gnome 3: Hidden Path in the Gold Key Room
Investigate the lower part of the room for a patch of darker grass; this indicates a hidden path leading to the third gnome.
You can also access this gnome on the good route when Thora unveils the secret passage upward in the room located to the left of the Hollowseed room.
Another way to find this gnome is by taking the good route, which Thora will reveal to you. This path leads upward in the room that’s just to the left of the Hollowseed room — it’s a sneaky little shortcut!
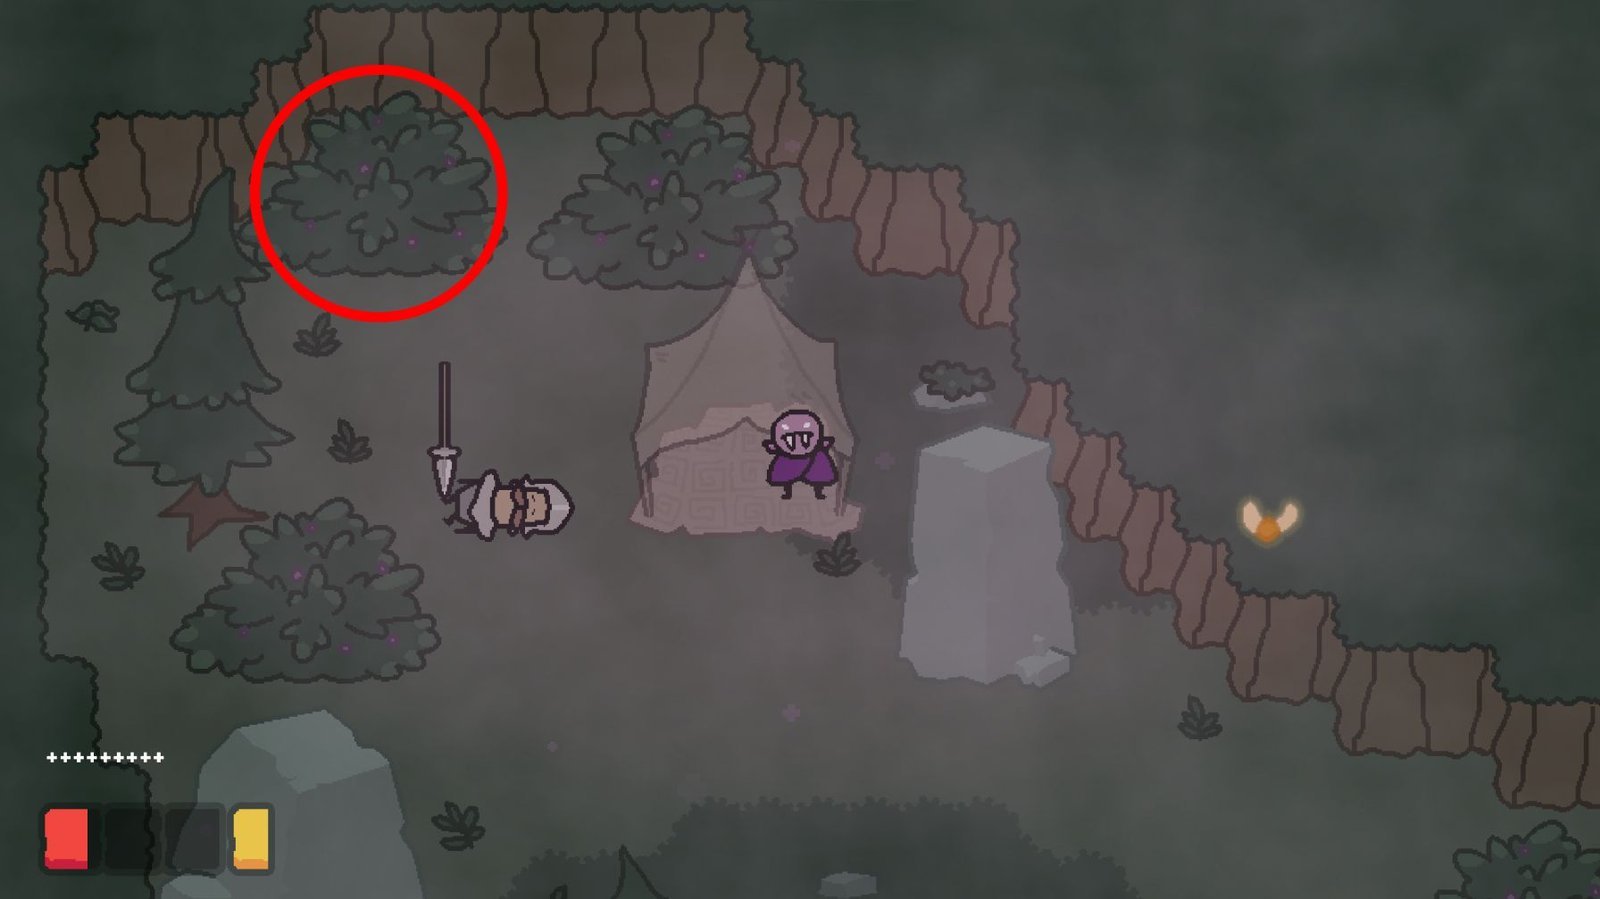
Gnome 4: Bush Near the Hollowseed Room
Check the bush in the upper-left corner, where the fourth gnome is concealed.
Be sure to peek into the bush in the upper-left corner. You’ll find the fourth gnome cleverly hidden there, waiting patiently for you to spot it.
Level 5 – Gnome Location
Make sure you check this route before entering the cave.
Make sure you explore this route before you wander into the cave; trust me, it’s worth it to check here first!
Level 6 – All 2 Gnome Locations
Gnome 1: Before the Room With Glurk
Head right to find the first gnome sitting plainly out in the open.
Make your way towards the right side of the area, and you’ll quickly spot the first gnome hanging out in plain sight, just waiting for you to discover him.
Gnome 2: Hidden Path at the Start of the Maze
Look for a dent in the wall and enter this hidden path to reach the second gnome.
Feel free to explore and keep your eyes peeled for all those elusive gnomes!