In Queen’s Domain, there’s a hidden island that seems tough to access, but I’ve found a way to do it. By leveraging all five air dashes and using a sword that has a lunging attack, you can bridge the gap. In this guide, I’ll share how to climb onto the Mausoleum roof, execute the jump to the island, and uncover the rewards waiting there.
Hidden Island Guide
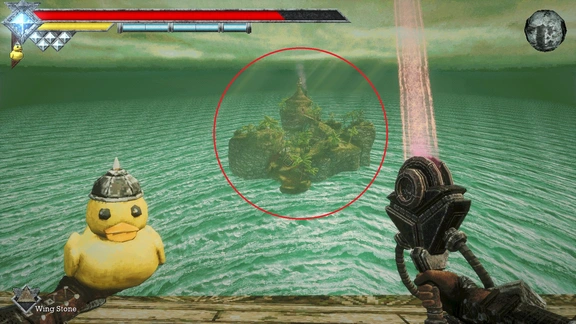
The hidden island can be spotted while exploring Queen’s Domain, set apart from the areas you can typically access. Check out the image below to see the island I’m referring to.
Where Is the Hidden Island?
Here’s what you need to gather for your quest to reach the island:
Once you’ve got everything set, it’s time to head up to the Mausoleum.
Requirements for Reaching the Hidden Island
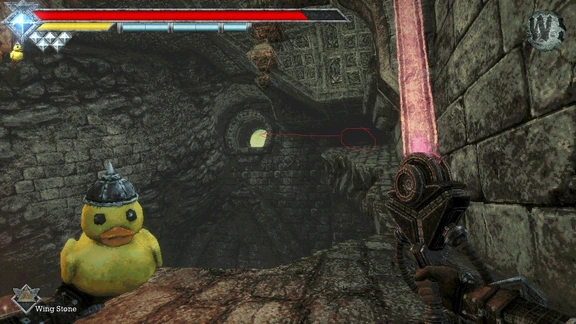
Your first task is to locate the window near the Mausoleum entrance shown in the image. This can be accessed from the starting point after tackling the Grand Archives, just a short walk away.
Follow the path until reaching the far end, where a sarcophagus sits. Jump onto the sarcophagus and use an air dash to leap onto the nearby ledge.
After securely landing on the ledge, jump outward while turning slightly left, utilizing two air dashes to get to where the skeletons are. If your direction is a bit off, don’t worry; just dash again to correct your course.
How to Get onto the Mausoleum Roof
Once you land successfully in the skeleton’s lair, the path to the roof will get a lot easier to navigate. Just continue along this route until you reach the top of the Mausoleum.
Step 1: Find the Window Near the Mausoleum Entrance
Head toward the eastern edge of the roof, as depicted in the image below. If it’s your first time here, be prepared to face a miniboss near a cluster of braziers, who drops what I think is the Green Sealstone.
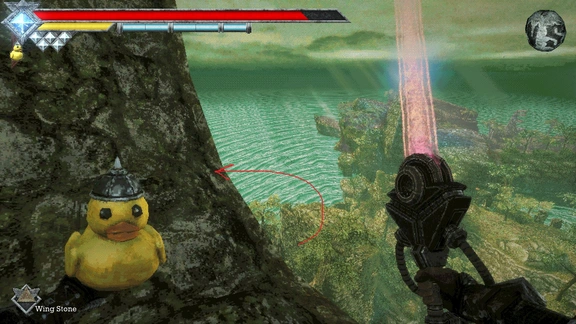
From the eastern edge, drop down to the platform behind the big cross; this is your launch pad for the next leap towards the island. Get in position as shown in the image below and make sure you’re ready for a good running start before leaping.
Step 2: Air Dash Left Toward the Skeletons
There are two strategies to consider here. You can either space your air dashes carefully to maximize airtime or, like I did, spam dashes before launching into multiple sword lunges while in mid-air.
The Rusty, Ancient, and Pandora swords all have lunging attacks that push you forward. Just a warning, though: these attacks can also draw you down towards the ground, so try to maintain height while crossing.
Step 3: Follow the Path to the Roof
Once you’re on that hidden island, take the time to enjoy the area and gather the various treasures available.
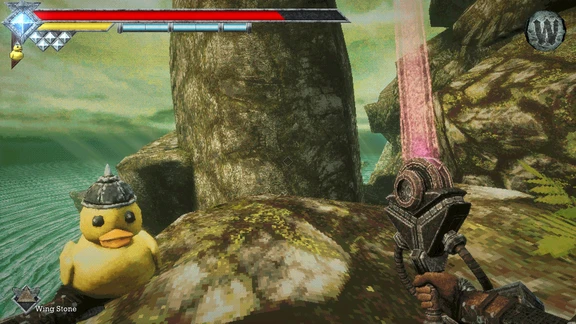
How to Jump from the Mausoleum Roof to the Island
So here I am, perched on the roof of the Mausoleum, gearing up for what’s sure to be the toughest part of my journey. My goal is to reach the far eastern edge, where I’ll need to find the perfect spot to make my jump. With my movement skills honed, I’m ready to vault across the gap ahead.
Step 1: Go to the Eastern Edge of the Roof
I’m heading over to the eastern edge of the Mausoleum roof right now, just like you can see in the image below. It’s a beautiful view up here, but I’ve got my sights set on making that jump.
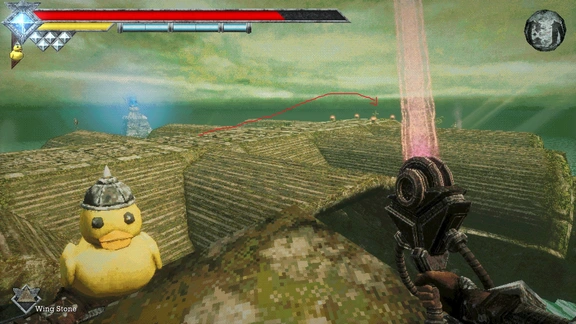
On my first run through this area, I stumbled upon a miniboss hanging out right in the middle of four braziers. This foe drops an item I think is called the Green Sealstone, which is pretty neat! It was a challenging encounter, but totally worth it.
If it’s my first time exploring, and I find out I’m short on air dashes, I often choose to leave and return later. Trying to navigate to the island without having enough movement abilities can turn into quite the struggle, and I’d rather wait until I’m ready.
Step 2: Drop onto the Platform Behind the Cross
From my spot at the eastern edge, I carefully drop down onto the roof platform that’s located just behind the cross. This is the launching pad I’ll use to set myself up for that big leap toward the island.
I’m using the position you can see in the image below, making sure to get a solid running start before I leave the platform. It’s all about that momentum!
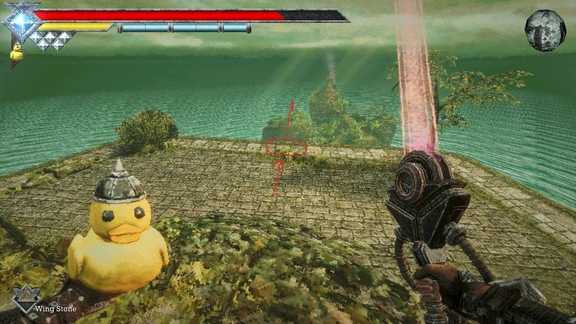
Step 3: Combine Air Dashes with Sword Lunges
After I make that exhilarating running leap, I kick things into high gear by using my air dashes to glide toward the island. But here’s the kicker: even if I unleash five air dashes, I still find myself a tad short of the shore unless I nail the timing just right. It’s all about precision!
When it comes to tackling this jump, I’ve got a couple of strategies on the table. I could opt for a more measured approach, spacing out my air dashes to maximize my airtime, or I could go with the technique that has worked wonders for me: dashing forward in quick succession and then unleashing my sword’s lunging alternate attack as many times as I can while soaring through the air. It adds a nice bit of flair and kick!
I’ve got three trusty swords in my arsenal—the Rusty Sword, Ancient Sword, and Pandora Sword—each equipped with lunging attacks that send me flying forward. The catch? Those attacks also have a tendency to drag me down toward the ground, which means I really have to keep my altitude in check during my daring crossing!
If I’m looking for a quick boost while airborne, I can smoothly switch over to a Cestus and throw in an uppercut, which gives me just the nudge I need to gain a bit of extra height. Every little bit counts, especially in these tricky jumps!
By seamlessly merging my air dashes with those repeat sword lunges, I can cover that final stretch and finally hit the shores of the island. The thrill of sailing through the air and reaching my destination is absolutely worth it!
Hidden Island Loot and Rewards
As soon as I successfully touch down on the elusive island, I’m ready to dive into exploration mode. The small area is packed with some noteworthy treasures just waiting to be collected. It’s always a little treasure hunt adventure out here!
- Trader’s House Keys: These little gems drop from a miniboss that hangs out on the island, just waiting for you to take him on!
- Filthy Lootbag: You can get your hands on this lovely item while adventuring around the island. Keep your eyes peeled for all the treasures hiding in nooks and crannies!
- Silver Skull: If memory serves me right, one of these notorious silver skulls is cleverly concealed behind the shed. A little exploration goes a long way!
- Yellow Chest: A bright yellow chest can be spotted on one of the cliffs. To crack it open, I’ll need the keys from Umbada, which I can snag after I unlock his front door. Adventure awaits!
That’s my ticket to get to the hidden island nestled in Queen’s Domain! The key element here is making sure I’ve got all five air dashes and a trusty sword that has a lunging attack capability. Once I’ve scaled the Mausoleum’s roof and pinpoint the perfect jumping spot, I can unleash these skills to leap across the gap and dive into an exciting exploration of the island.