Playrooms achievements can be earned by completing various tasks such as collecting balls, unlocking rooms, and rescuing hidden sparrows. To achieve 100% completion, you’ll also need to fill all eight ball pits and tackle some special tasks along the way.
While most achievements are straightforward, others, like Colour is a Distraction and Model Employee, require careful planning. As you explore, you might find yourself unsure where to go next or what to collect, which can waste precious time and resources if you’re not careful.
Before you dive in, make sure you check your progress using stats.exe on your PC. This will help you keep track of which items and sparrows you still need to find.
Here’s what you need to know about tracking your achievement progress: use stats.exe on your PC. The Overview tab under Progress shows your collected items and sparrow count. But remember, you won’t see these counters until you’ve collected at least one of each item. Luckily, you don’t have to worry about permanently locking yourself out of any achievements, so any mistakes you make while collecting won’t hinder your overall progress.
Important Things to Know
If you’re curious about how far you’ve come in the game, just hop onto your PC and launch stats.exe. Once you’re in, navigate to the Overview tab, and there you’ll find all the juicy details about your Progress, including the objects you’ve collected and the total count of sparrows you’ve snagged.
Here’s a little nugget of wisdom for you: don’t worry if you don’t see the object and sparrow counters right away. They only kick in after you’ve collected at least one of each. So get out there, grab your first couple of items, and watch those counters come to life!
No need to feel anxious about missing out on any achievements! Even if you stumble while collecting balls or trying to fill up a pit, you’re never going to be permanently stuck. Just keep pushing forward, playing the game, and you’ll be able to work your way toward completing all those achievements you’re aiming for.
Ball Pit Unlock Requirements
To unlock new and exciting equipment as well as additional features, you’ll need to gather and deliver those shiny balls. It’s all part of the adventure, so dive in and start collecting to see what cool upgrades await you!
| Ball Pit | Balls Required | Unlock |
|---|---|---|
| Pit 1 | 1,500 | Sprint |
| Pit 2 | 2,500 | Coffee |
| Pit 3 | 5,000 | Crouch |
| Pit 4 | 10,000 | Scanner |
| Pit 5 | 20,000 | Fruit Basket |
| Pit 6 | 40,000 | More Robots? |
| Pit 7 | 40,000 | Not specified |
| Pit 8 | 80,000 | Not specified |
All Sparrow and Collectible Achievements
First Sparrow – Rescue your first sparrow.
To snag this achievement, all you have to do is locate and collect one of those elusive hidden sparrows. Once you’ve added your first sparrow to your collection, don’t forget to check your progress in stats.exe to see your accomplishment reflected!
All the Chirps: Discover every sparrow hidden throughout the game.
It’s time to embark on a little treasure hunt for those charming little sparrows! Remember, these feathered friends won’t be chirping away to give you hints, so you’ll have to keep your eyes peeled and search diligently. Good luck hunting!
If you’re on the lookout for where all the sparrows are nestled, be sure to check out this guide: Playrooms – All 20 Sparrows Location. It’ll point you in the right direction!
Eagle Eye: Track down every item you need for your office.
Get ready to scout the various rooms and nab every elusive office item you can find. If you’re curious about how much progress you’ve made in this hunt, just peek at your collected object count under the Progress section in stats.exe. Happy searching!
Dive into the adventure with this guide: Playrooms: All Hidden Item Locations (Office Decorations), where you’ll uncover all the hidden treasures waiting for your office!
Free Lexi: Meow meow meow! There’s something special about these little missions, isn’t there? Let the cuteness unfold!
Out of Water – Find the Whale
Requirement: Seek out and find the whale. It’s a big task, but the reward will be totally worth it!
Room needed: Waiting Room
Your adventure kicks off with unlocking the Waiting Room. When you step inside, make a beeline towards the left hallway and don’t forget to pop open that very first door on your right. You’re officially on your way!
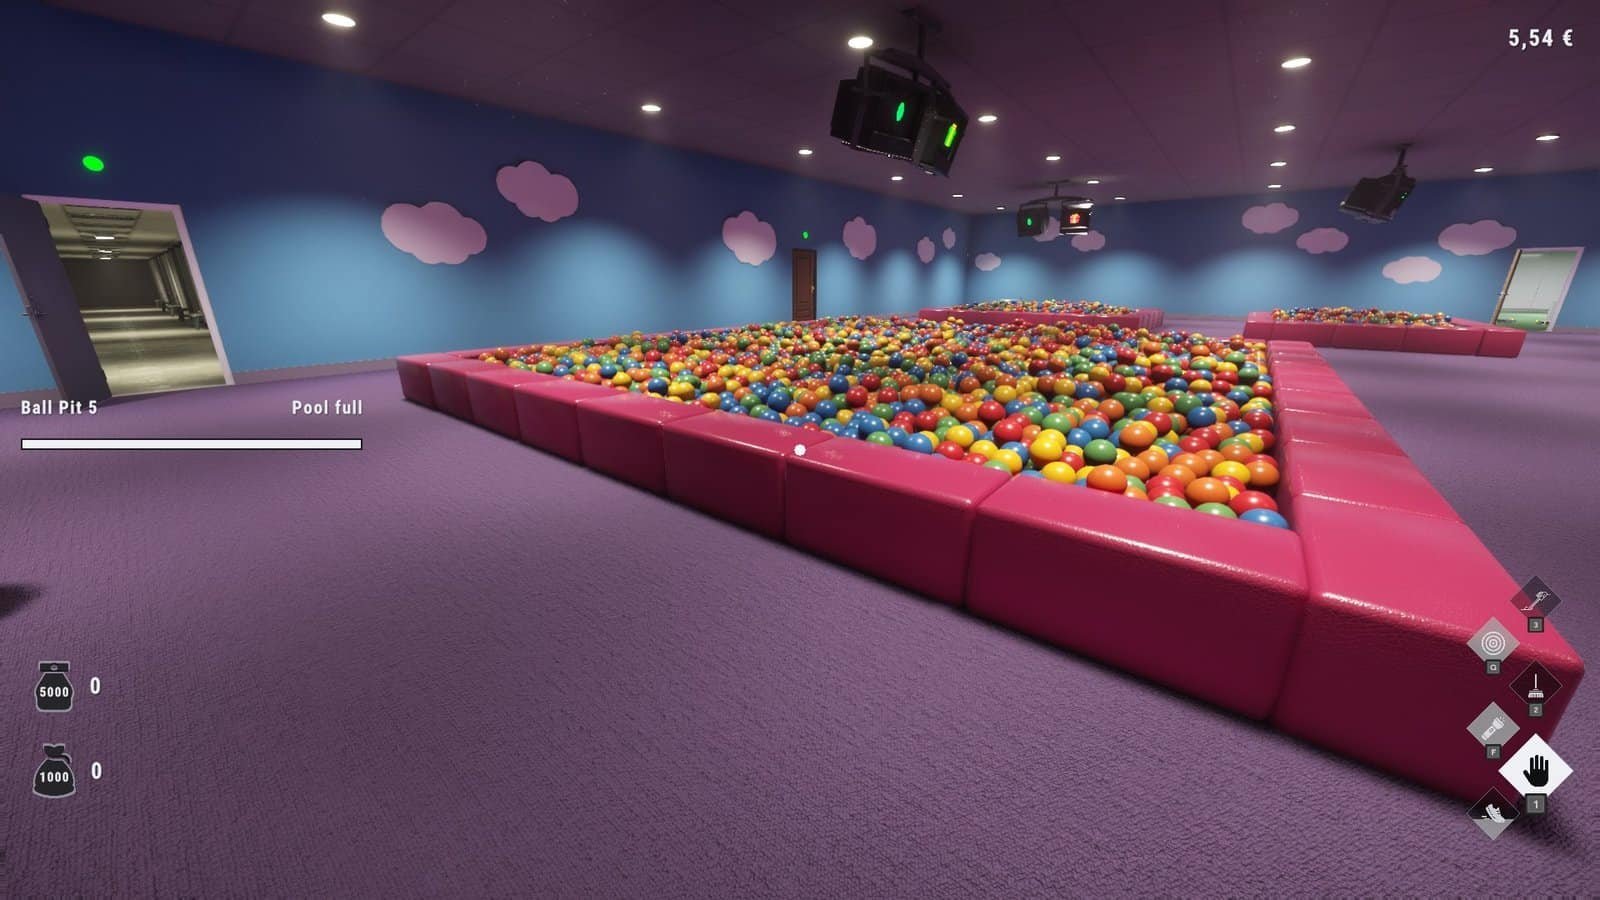
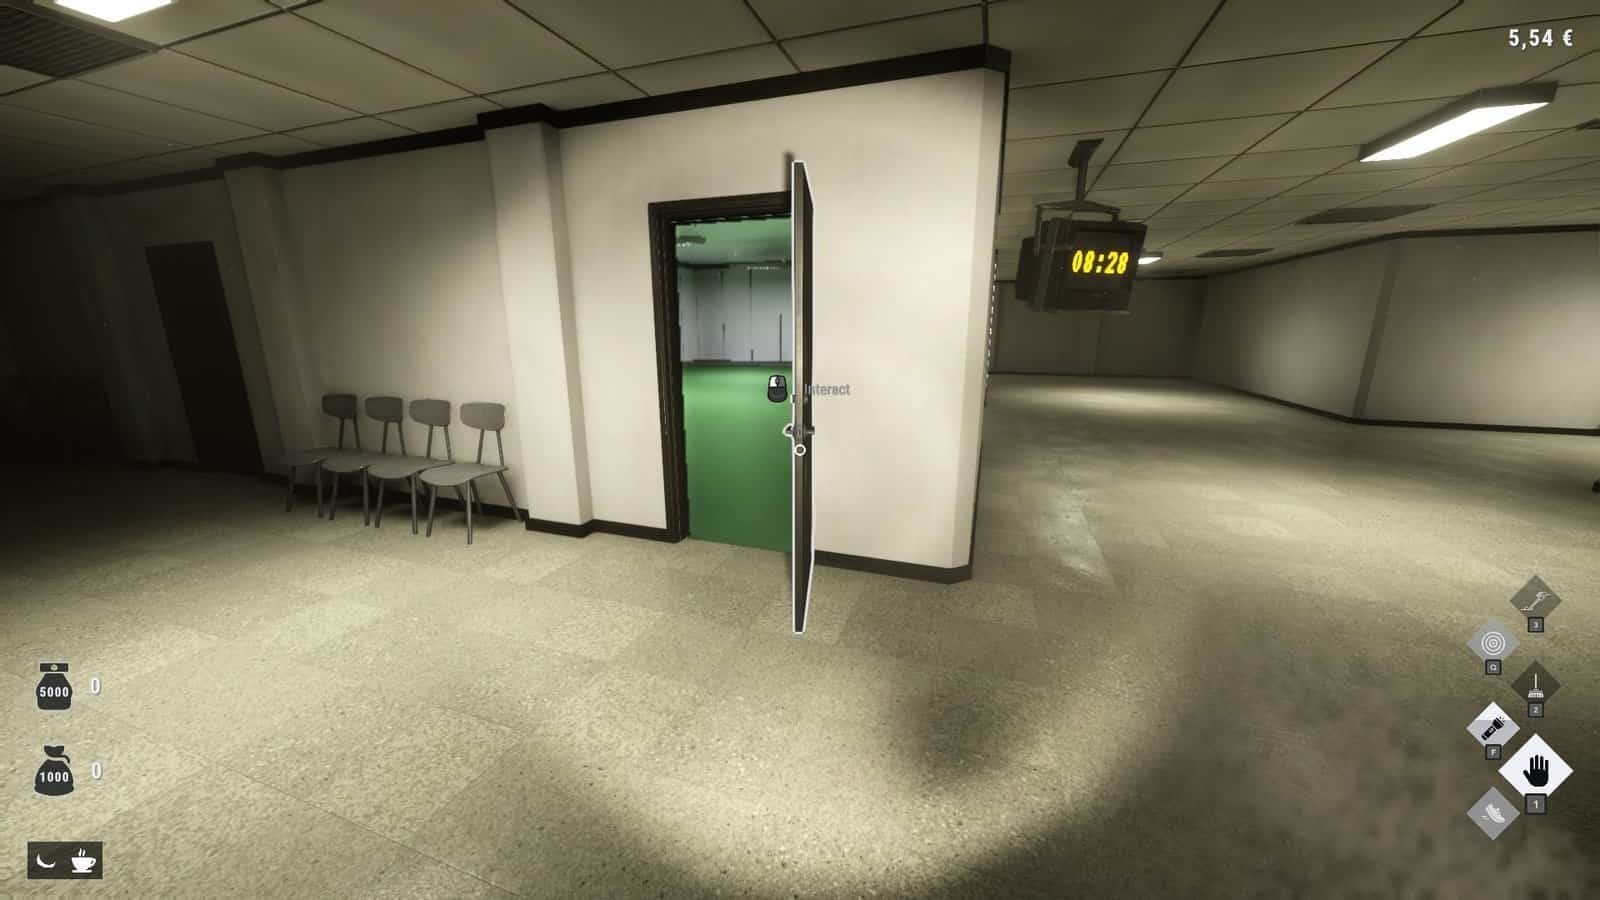
Inside, you’ll encounter a maze that’s waiting to challenge you. Stick to the time-tested method of following the right wall first, then switch over to the left wall as you navigate your way through. Keep going until you finally bump into the majestic whale.
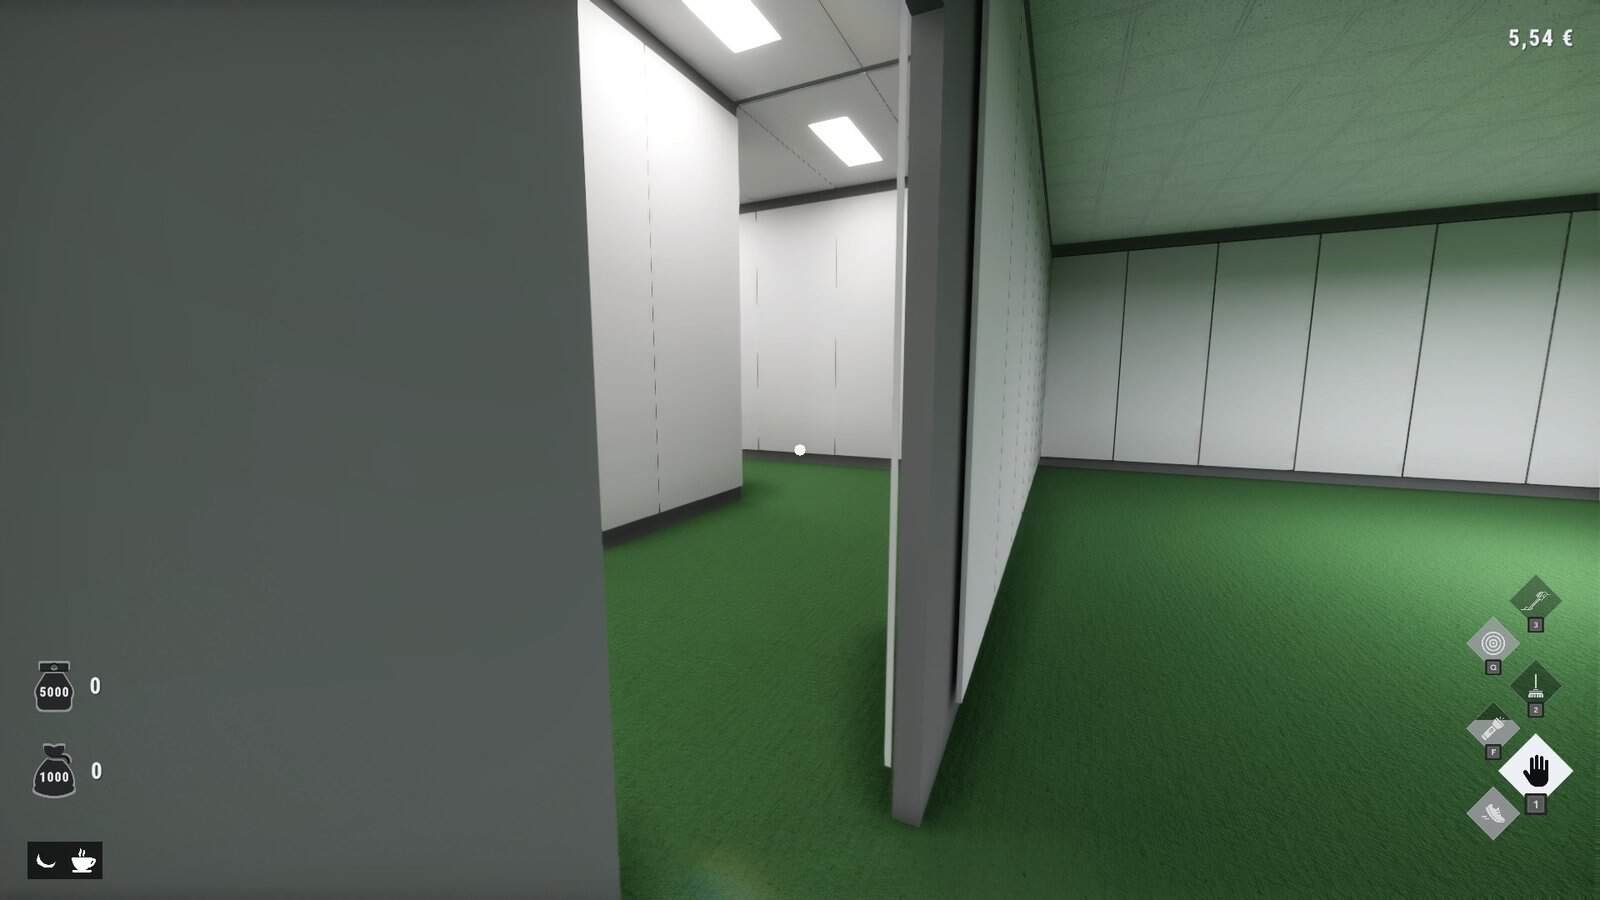
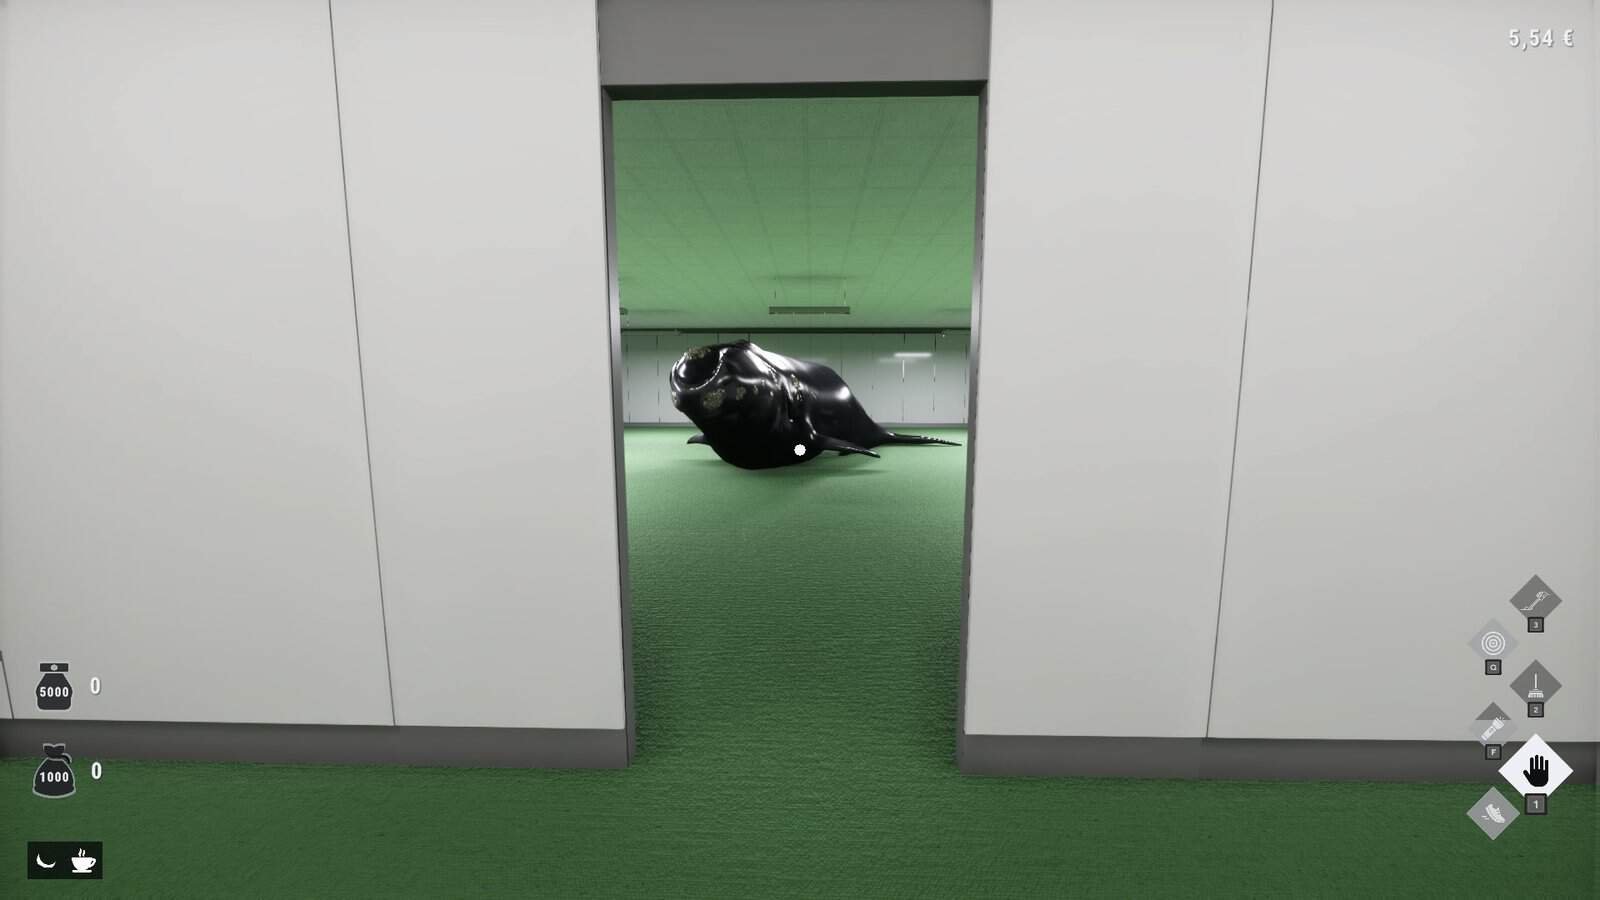
If the maze starts to feel like a puzzle that’s got you going in circles, don’t sweat it! Just keep your focus on the walls around you instead of wandering off on random paths. Stick with it, and you’ll find your way out in no time.
All Room Entry Achievements
Each achievement you find is tied to your first steps into the various rooms. You’ll unlock them as you discover these spaces for the very first time. It’s all part of the journey!
| Achievement | Requirement |
|---|---|
| Clocking In | Enter the Playroom |
| Please Take a Number | Enter the Waiting Room |
| Level 0 | Enter the Backrooms |
| Splash Splash | Enter the Poolroom |
| Back to School | Enter the School |
| Overtime | Enter the Office |
| Housekeeping | Enter the Hotel |
All Room Cleaning Achievements
Don’t forget, collecting every single ball in each room is essential for your success!
| Achievement | Requirement | Total Balls |
|---|---|---|
| Clean Playroom | Gather all the balls in the Playroom | 5,000 |
| Clean Waitingroom | Round up every ball in the Waiting Room | 10,000 |
| Clean Backrooms | Collect every ball from the Backrooms | 35,000 |
| Clean Poolroom | Snatch up all the balls in the Poolroom | 30,000 |
| Clean School | Gather every ball in the School | 42,000 |
| Clean Office | Collect each and every ball in the Office | 50,000 |
| Clean Hotel | Retrieve all the balls in the Hotel | 100,000 |
Cleaning each room is also part of your achievements. You need to collect every ball from each room to complete its cleaning achievement:
| Achievement | Requirement | Total Balls |
|---|---|---|
| Clean Playroom | Collect every ball in the Playroom | 5,000 |
| Clean Waiting Room | Collect every ball in the Waiting Room | 10,000 |
| Clean Backrooms | Collect every ball in the Backrooms | 35,000 |
| Clean Poolroom | Collect every ball in the Poolroom | 30,000 |
| Clean School | Collect every ball in the School | 42,000 |
| Clean Office | Collect every ball in the Office | 50,000 |
| Clean Hotel | Collect every ball in the Hotel | 100,000 |
Use the equipment and robots available to speed up your collection process.
Door Operator – Discover Every Room
Requirement: You’ll need to purchase every room key to get going.
The good news is, you don’t actually have to step into each room to achieve this. Just buying all six keys will do the trick!
You might want to grab them in this order for a smoother experience:
| Key | Price |
|---|---|
| 2nd Door on the Right (Waiting Area) | €10 |
| 1st Door on the Right (Back Rooms) | €25 |
| 1st Door on the Left (Pool Room) | €50 |
| 2nd Door on the Left (School) | €60 |
| 3rd Door on the Right (Office) | €90 |
| 3rd Door on the Left (Hotel) | €100 |
To gain access to the mysterious Door Operator, you’ll need to procure all six keys. It’s a quest in itself, so make sure you’re on the lookout for those elusive items!
Ball Pit and Delivery Achievements
Hooray
To unlock the Hooray achievement, you need to fill the first ball pit, which requires collecting 1,500 balls.
The achievement 10,000 Reasons to Quit is reached after you deliver a total of 10,000 units. Keep collecting those balls and delivering them to the pits until you hit this total.
10,000 Reasons to Quit
Requirement: You’ll need to successfully deliver a whopping 10,000 units. This is no small feat, so gear up and get moving!
Your mission is to keep gathering those balls and sending them off to the pits. Stay diligent until you hit that big milestone of 10,000 total deliveries—it’s going to feel amazing when you do!
And They Keep Coming
Requirement: Now, set your sights even higher with a goal to deliver an impressive 100,000 units. This is where your skills will truly shine!
Keep up the momentum by continuously filling those ball pits and making your deliveries. Once you hit that incredible mark of 100,000 delivered units, you’ll unlock an achievement that really showcases your hard work!
Model Employee
Requirement: Your next challenge is to completely fill all eight ball pits. It’s time to strategize and make sure each pit gets its fair share of the action!
To unlock this particular achievement, you’ll need to dive into all eight ball pits! In total, you’re looking to collect a hefty 199,000 balls. So gear up and get ready for an exciting challenge!
And They Keep Coming requires you to deliver 100,000 units. Just keep on filling the ball pits and delivering until you achieve this number.
Clock Out – Fill the Final Ball Pit and Exit
Clock Out requires you to fill the eighth ball pit and then leave the Playroom. After filling all eight pits, head to the back of the Playroom and use the double push doors to exit. You’re free to leave as soon as the last pit is full—there’s no need to collect every leftover ball.
To accomplish the Colour Is a Distraction achievement, you need to fill one ball pit exclusively with one color of balls. This can prove tricky since you can’t remove balls once they’re placed. Here are a few tips to help:
- Avoid Ball Magnet: This upgrade restricts you from choosing specific ball colors, making it more difficult to control what you collect.
- Buy Quick Grab: It reduces the delay between grabbing balls, speeding up your collection rate.
- Vacuum Collect is optional: Though it allows for continuous pressing of the mouse button, be cautious as it may lead to accidental collection of other colors.
- Be mindful of Big Pockets: While being able to carry more balls is great, selecting the wrong color can spoil your goal.
- Choose a distinct color: I found blue to be easy to differentiate from others, especially in dimly lit areas.
If you accidentally collect a different color, avoid placing those balls into your target pit and take them to another pit instead.
Using the first ball pit is your best bet for this achievement since it only requires 1,500 balls, allowing you to complete it quickly.
Colour Is a Distraction – Fill a Ball Pit With One Colour
To unlock Mighty Hand, purchase every upgrade under the Hand section in skills.exe. You’ll need to fully upgrade all five hand skills, with a total cost of €59.60.
| Hand Skill | Level 0–1 | Level 1–2 | Level 2–3 | Level 3–4 | Level 4–5 |
|---|---|---|---|---|---|
| Big Pockets | €0.60 | €1.40 | €1.90 | €4.40 | €14.00 |
| Quick Grab | €0.60 | €1.40 | €1.90 | €3.50 | €4.90 |
| Vacuum Collect | €0.60 | — | — | — | — |
| Long Arms | €0.80 | €1.60 | €1.90 | €2.50 | €4.90 |
| Ball Magnet | €0.40 | €0.90 | €3.00 | €3.50 | €4.90 |
Purchase these to achieve the Mighty Hand unlock.
Unlocking the A New Colleague achievement involves purchasing your first vacuum robot. First, unlock the charging station, costing €10, before you buy a Roomba for €8.
The vacuum robot becomes available in shop.exe when you’ve filled Pit 6, which requires 40,000 balls. Follow these steps:
- In shop.exe, purchase the charging station for €10.
- Buy your first Roomba for €8.
Doing this will complete A New Colleague.
Check out these handy tips to help you on your journey:
- Steer Clear of Ball Magnet: This feature doesn’t allow you to select a specific ball color, which can make it a bit trickier to gather what you need.
- Invest in Quick Grab: This handy upgrade minimizes the time it takes for you to pick up balls, helping you gather them much quicker.
- Vacuum Collect is Optional: This lets you hold down the left mouse button for a continuous collection instead of clicking multiple times. Just be cautious, as it can sometimes make you zoom around and snag a ball of the wrong color.
- Watch Out for Big Pockets: While being able to carry more balls is certainly beneficial, accidentally picking up the wrong color can spell disaster for your bag’s contents.
- Opt for a Color that’s Easy on the Eyes: Blue is a fantastic choice since it stands out well against various other colors, especially in dim lighting.
If you happen to snatch up the wrong color balls, don’t fret! Just avoid dumping those into your target pit. Instead, transport the entire bag to another pit to keep things on track.
Which Ball Pit Should You Use?
For this achievement, I highly recommend you tackle the first ball pit. It only calls for 1,500 balls, which means you can complete it way quicker than the larger pits out there.
Don’t forget that any balls picked up by vents, robots, or other automatic helpers will arrive in the sequence they’ve been collected. You won’t have the option to pick their colors before they drop into a pit.
Avoid Wall Vents
When you step into a room that has a Wall Vent, hold off on making any purchases related to it while you’re chasing this achievement. Trust me, taking your time here can pay off in the long run.
Be on the lookout! Balls have a sneaky way of spawning right inside the vent, so they might be tough to spot. Plus, the vent has this tendency to automatically pull in nearby balls, which throws a wrench into your plans when it comes to controlling which colors make it into your pit. Stay alert!
Mighty Hand – Fully Upgrade All Hand Skills
What you need: Go ahead and buy every single upgrade in the Hand section of skills.exe. It’s the key to leveling up your game.
To hit that goal, you’ll have to completely upgrade all five of your hand skills. Just a heads-up, the total investment for these upgrades sums up to a neat €59.60. It’s worth it for all the perks you’ll gain!
For Fully Equipped Part 1, you must max out every upgrade in the first upgrade group. Here’s what you need to buy:
Hand
| Upgrade | Level 0–1 | Level 1–2 | Level 2–3 | Level 3–4 | Level 4–5 |
|---|---|---|---|---|---|
| Big Pockets | €0.60 | €1.40 | €1.90 | €4.40 | €14.00 |
| Quick Grab | €0.60 | €1.40 | €1.90 | €3.50 | €4.90 |
| Vacuum Collect | €0.60 | — | — | — | — |
| Long Arms | €0.80 | €1.60 | €1.90 | €2.50 | €4.90 |
| Ball Magnet | €0.40 | €0.90 | €3.00 | €3.50 | €4.90 |
Make sure you purchase every upgrade for the Hand category to unlock this achievement.
For the Fully Equipped Part 2 achievement, max out the remaining equipment upgrades, which include Ball Vents, Robot Vacuums, Coffee, Fruit Basket, Hand Vacuum, and Inventory Scanner.
Ball Vent
| Upgrade | Level 0–1 |
|---|---|
| Suction Force | €2.00 |
| Intake Reach | €2.00 |
| Intake Speed | €2.00 |
| Throughput | €1.90 |
Don’t forget to unlock each piece in this category for your achievements!
A New Colleague – Buy Your First Vacuum Robot
What you need: Make sure you get your first vacuum robot—it’s a game changer!
Before you can snag yourself a Roomba, you’ll need to unlock the charging station. It’s super affordable, costing just €10. Your first Roomba, on the other hand, will set you back €8. Budget wisely!
Once you’ve successfully filled up Pit 6 with a whopping 40,000 balls, your next treat will be the vacuum robot, which you can grab from shop.exe. It’s a delightful addition to your toolkit!
After you’ve achieved the magical fill for Pit 6, it’s time to dive into shop.exe and make your purchases!
- Fire up shop.exe.
- First up, snag the charging station for just €10.
- Then, treat yourself to your very first Roomba at the price of €8.
Completing these steps will unlock the new quest titled A New Colleague, which is packed with excitement!
Fully Equipped Part 1 – Max Out Every Possible Upgrade
Requirement: You will need to fully upgrade all the gear available in the first upgrade group to move forward.
Make sure you buy every single upgrade on the list below. It’s essential for your progression!
Hand
| Upgrade | Level 0–1 | Level 1–2 | Level 2–3 | Level 3–4 | Level 4–5 |
|---|---|---|---|---|---|
| Big Pockets | €0.60 | €1.40 | €1.90 | €4.40 | €14.00 |
| Quick Grab | €0.60 | €1.40 | €1.90 | €3.50 | €4.90 |
| Vacuum Collect | €0.60 | — | — | — | — |
| Long Arms | €0.80 | €1.60 | €1.90 | €2.50 | €4.90 |
| Ball Magnet | €0.40 | €0.90 | €3.00 | €3.50 | €4.90 |
Ball Pit
| Upgrade | Level 0–1 | Level 1–2 | Level 2–3 | Level 3–4 | Level 4–5 |
|---|---|---|---|---|---|
| Quick Hands | €0.80 | €1.60 | €2.00 | €2.50 | €4.90 |
Light
| Upgrade | Level 0–1 | Level 1–2 | Level 2–3 | Level 3–4 | Level 4–5 |
|---|---|---|---|---|---|
| Longer Days | €0.90 | €1.90 | €4.40 | €4.90 | €15.00 |
| Slow Blackout | €0.90 | €2.00 | €2.00 | €2.80 | €7.00 |
Legs
| Upgrade | Level 0–1 | Level 1–2 | Level 2–3 | Level 3–4 | Level 4–5 |
|---|---|---|---|---|---|
| Sprint Stamina | €3.00 | €3.00 | €3.80 | €4.50 | €12.00 |
| Sprint Speed | €1.50 | €1.90 | €3.80 | €5.60 | €12.00 |
Flashlight
Ready to unlock the Flashlight? It’s going to cost you €5 to bring that light into your adventure.
| Upgrade | Level 0–1 | Level 1–2 | Level 2–3 | Level 3–4 | Level 4–5 |
|---|---|---|---|---|---|
| Battery Life | €1.50 | €1.50 | €2.50 | €4.20 | €8.00 |
| Beam Brightness | €1.90 | €1.90 | €2.50 | €4.20 | €8.00 |
| Beam Range | €3.00 | €3.00 | €3.00 | €4.20 | €8.50 |
| Fast Charge | €2.00 | €2.00 | €2.50 | €4.20 | €8.50 |
Push Broom
Unlocking the Push Broom will set you back €15, but it’s totally worth it for the cleaning power!
| Upgrade | Level 0–1 |
|---|---|
| Load | €1.80 |
| Flick | €1.70 |
| Push Tempo | €1.80 |
| Sweep Width | €1.70 |
Ball Vacuum
If you’re looking to get started with the Ball Vacuum, it’s going to cost you €20 to unlock this nifty gadget.
| Upgrade | Level 0–1 | Level 1–2 |
|---|---|---|
| Upload Speed | €4.00 | €4.50 |
| Tank Size | €4.00 | €4.50 |
| Intake Reach | €4.00 | €4.50 |
| Intake Speed | €4.00 | €4.50 |
Fully Equipped Part 2 – Max Out the Remaining Equipment
This achievement is all about enhancing your gear game! It encompasses the remaining essentials like Ball Vents, Robot Vacuums, Coffee for that caffeine boost, Fruit Basket for health, Hand Vacuum for portability, and lastly, the Inventory Scanner to keep track of it all. Level up your setup!
Ball Vent
| Upgrade | Level 0–1 |
|---|---|
| Suction Force | €2.00 |
| Intake Reach | €2.00 |
| Intake Speed | €2.00 |
| Throughput | €1.90 |
Robot Vacuums (Roomba)
Coffee becomes available after you fill Pit 2.
| Upgrade | Level 0–1 | Level 1–2 | Level 2–3 | Level 3–4 | Level 4–5 |
|---|---|---|---|---|---|
| Strong Brew | €2.00 | €2.50 | €2.50 | €3.00 | €6.50 |
| Special Blend | €2.00 | €2.50 | €2.50 | €3.00 | €7.50 |
Fruit Basket unlocks after filling Pit 5.
| Upgrade | Level 0–1 | Level 1–2 | Level 2–3 | Level 3–4 | Level 4–5 |
|---|---|---|---|---|---|
| Fresh Picked | €2.20 | €2.50 | €3.20 | €6.50 | €10.50 |
| Mixed Basket | €2.20 | €3.20 | €8.00 | — | — |
Hey there! If you’re looking to give your trusty Robot Vacuum a little boost, let’s talk upgrade prices. These costs will help make your cleaning companion even more efficient and reliable. Let’s keep those floors spotless and save some time!
| Upgrade | Level 0–1 | Level 1–2 | Level 3–4 | Level 4–5 |
|---|---|---|---|---|
| Big Battery | €5.50 | €6.50 | — | — |
| Robot Tank | €5.50 | €6.50 | — | — |
| Robot Stacking | €5.50 | €6.50 | €13.00 | €17.50 |
| Fast Charging | €5.50 | €6.50 | €13.00 | €17.50 |
| Turbo Motor | €5.50 | €6.50 | €14.00 | €17.00 |
| Quick Unload | €5.50 | €6.50 | €14.00 | €19.00 |
Coffee
Here’s a little nugget for you: Coffee becomes available only after you’ve filled Pit 2. So, let’s get cracking on those pits and brew up some delicious coffee to keep the energy flowing during gameplay!
| Upgrade | Level 0–1 | Level 1–2 | Level 2–3 | Level 3–4 | Level 4–5 |
|---|---|---|---|---|---|
| Strong Brew | €2.00 | €2.50 | €2.50 | €3.00 | €6.50 |
| Special Blend | €2.00 | €2.50 | €2.50 | €3.00 | €7.50 |
Fruit Basket
Want to get your hands on some fresh snacks? You’ll unlock the Fruit Basket after you’ve filled Pit 5. So keep on filling those pits and you’ll be snacking on some tasty fruit in no time!
| Upgrade | Level 0–1 | Level 1–2 | Level 2–3 | Level 3–4 | Level 4–5 |
|---|---|---|---|---|---|
| Fresh Picked | €2.20 | €2.50 | €3.20 | €6.50 | €10.50 |
| Mixed Basket | €2.20 | €3.20 | €8.00 | — | — |
Hand Vacuum
If you’re looking to keep things tidy, the Hand Vacuum is your go-to gadget! Priced at €50, it becomes available for you to pick up after you’ve acquired the School Key. It’s a handy tool for cleaning up after yourself in the game, so don’t miss out on this essential item!
The Hand Vacuum costs €50 and becomes available after you purchase the School Key. Here’s what you’ll need:
| Upgrade | Level 0–1 | Level 1–2 | Level 2–3 | Level 3–4 | Level 4–5 |
|---|---|---|---|---|---|
| Auto Upload | — | — | — | — | — |
| Suction Cone | €8.00 | €9.00 | €15.00 | — | — |
| Nozzle Reach | €8.00 | €9.00 | €15.00 | — | — |
| Suction Power | €8.00 | €9.50 | €15.00 | — | — |
| Tank Size | €8.00 | €9.00 | €16.00 | €21.50 | — |
Inventory Scanner
The Inventory Scanner is a nifty little tool that you can snag for just €10. You’ll unlock it once you’ve successfully filled Pit 4. This handy device will help you keep track of your items and resources more efficiently as you navigate through the game, making your adventures a bit smoother.
| Upgrade | Level 0–1 | Level 1–2 | Level 2–3 | Level 3–4 | Level 4–5 |
|---|---|---|---|---|---|
| Cooldown | €2.00 | €2.20 | €3.20 | €6.50 | — |
| Display Duration | €2.00 | €2.20 | — | — | — |
| Scan Range | €2.00 | €2.50 | €3.20 | €6.50 | €10.00 |
To make progress towards the Fully Equipped Part 2 goal, be sure to grab the listed upgrades for your gear in this section. Each upgrade will enhance your equipment, boosting your overall performance and helping you get the most out of your gaming experience!