Finding the right spots to place your Graves in Deadlock is crucial, especially after the recent City Never Sleeps update. I’ve seen many players waste resources and time by sticking to old spots that just don’t work anymore. You can still utilize building ledges, windows, and other elevated surfaces to keep your Graves safe from enemy destruction.
The best Graves tombstone spots I’ve found cater to both the Hidden King and Archmother, and they dot the landscapes of Greenwich, York, and Broadway. Some locations are straightforward to access, while others might require a double jump or a dash for a successful placement. I found this out the hard way — so trust me, knowing these spots is worth it.
Below are the prime locations, complete with map screenshots, plus a few tips for discovering even more perfect hiding spots on your own.
Placing Graves doesn’t strictly require the exact spots in the screenshots. There are many building ledges and elevated surfaces throughout Deadlock where you can stealthily set up your Graves. Just hover your cursor over these areas and look for the green indicator that shows it’s a viable placement.
When scouting for the ideal spot, consider these pointers:
- Check building ledges first: The sides and tops of buildings are great for placement, as many ledges allow for easy access.
- Use double jumps or dash jumps: Some spots are just too high for a normal jump. Get creative with height to reach those tricky ledges.
- Utilize Greater Expansion: For some elevated areas, this ability helps you reach those hard-to-get placements. Don’t forget about the benefits of Arcane Surge, which can assist in alignment.
- Seek cover: Things like tree branches and windows can effectively hide your Graves, making it tough for enemies to spot them.
- Verify the final position: Sometimes, the Grave may momentarily look like it landed inside a wall or isn’t quite positioned right. Be patient and wait to see where it actually settles before leaving it.
Simply put, the best placements are the ones that force your enemies to take longer routes or utilize their movement skills to access your Grave. Even a tiny ledge can become an effective hiding spot if it complicates enemy access.
In simple words, the best spots are the ones that force enemies to take a longer route or use movement abilities to reach your Grave. Even a small ledge can work if enemies can’t get to it easily.
Now, let’s look at some excellent Gravel Tombstone spots in Greenwich.
Greenwich is loaded with useful Graves Tombstone placements, strategically located around Guardians, Walkers, trees, and across buildings. Refer to the screenshots below for exact locations suited for both teams.
Guardian Tomb — Hidden King
Guardian Tomb — Hidden King
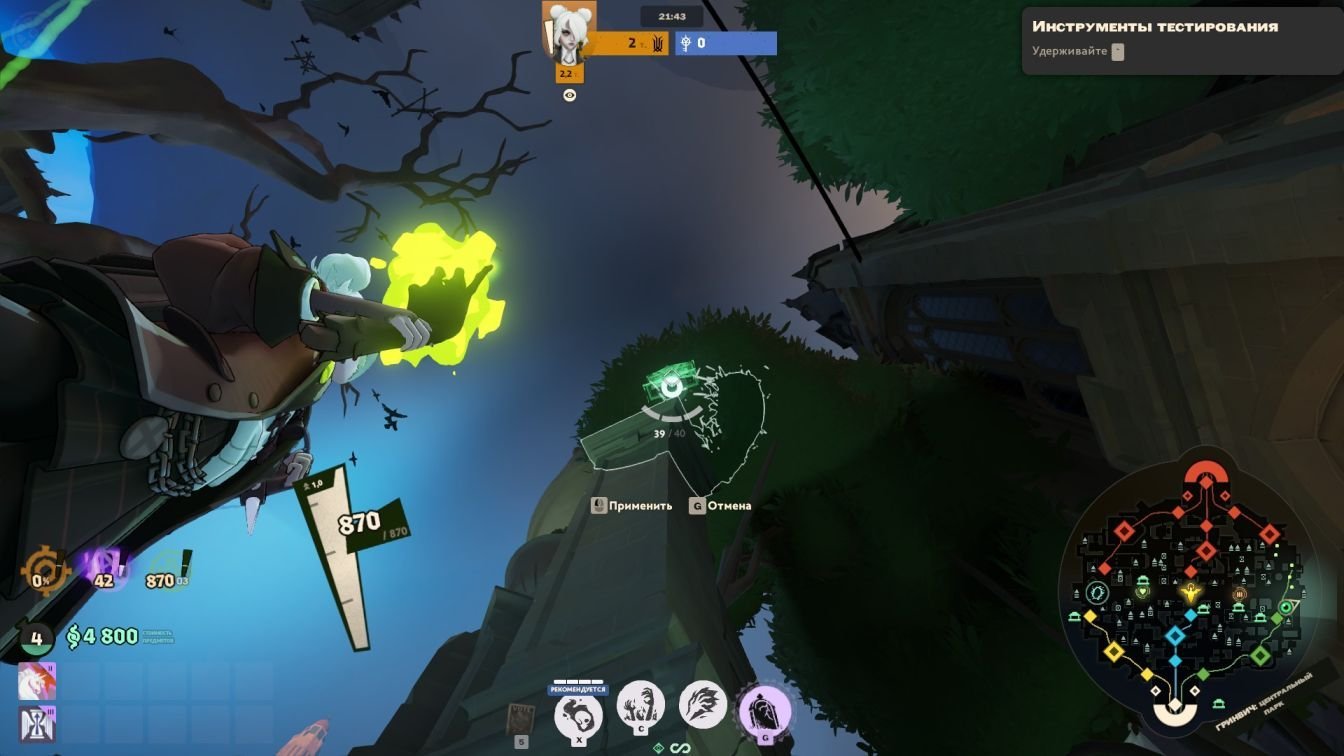
Walker Tomb — Hidden King
Guardian Tomb — Archmother
Guardian Tomb — Archmother
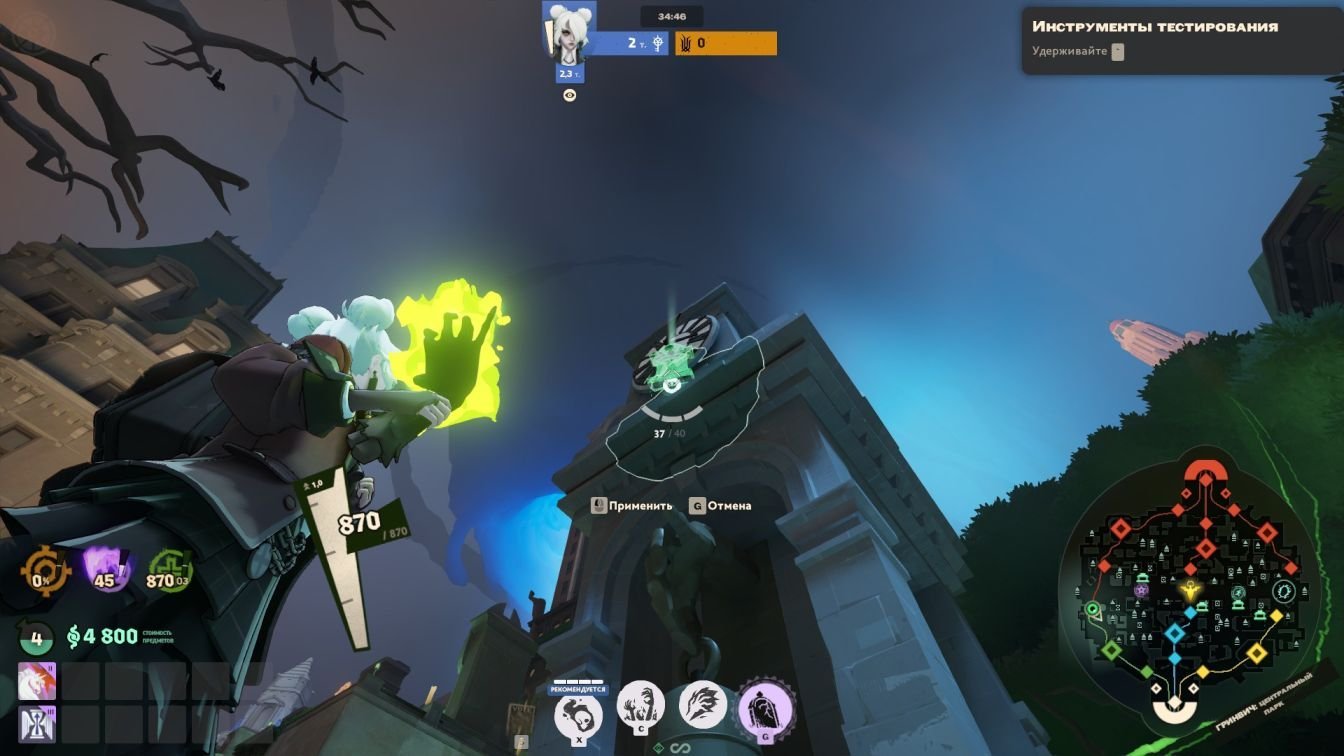
Walker Tomb — Archmother
Recommended Read: Deadlock: How to Say “I’m Gonna Rat”
Now let’s consider York, which also features a mix of placements around Guardians and Walkers . Be mindful that some locations may pose a challenge to reach directly — double-check the screenshots for guidance.
Guardian Tomb — Hidden King
Hidden King Graves
Walker Tomb — Hidden King
Walker Tomb — Hidden King
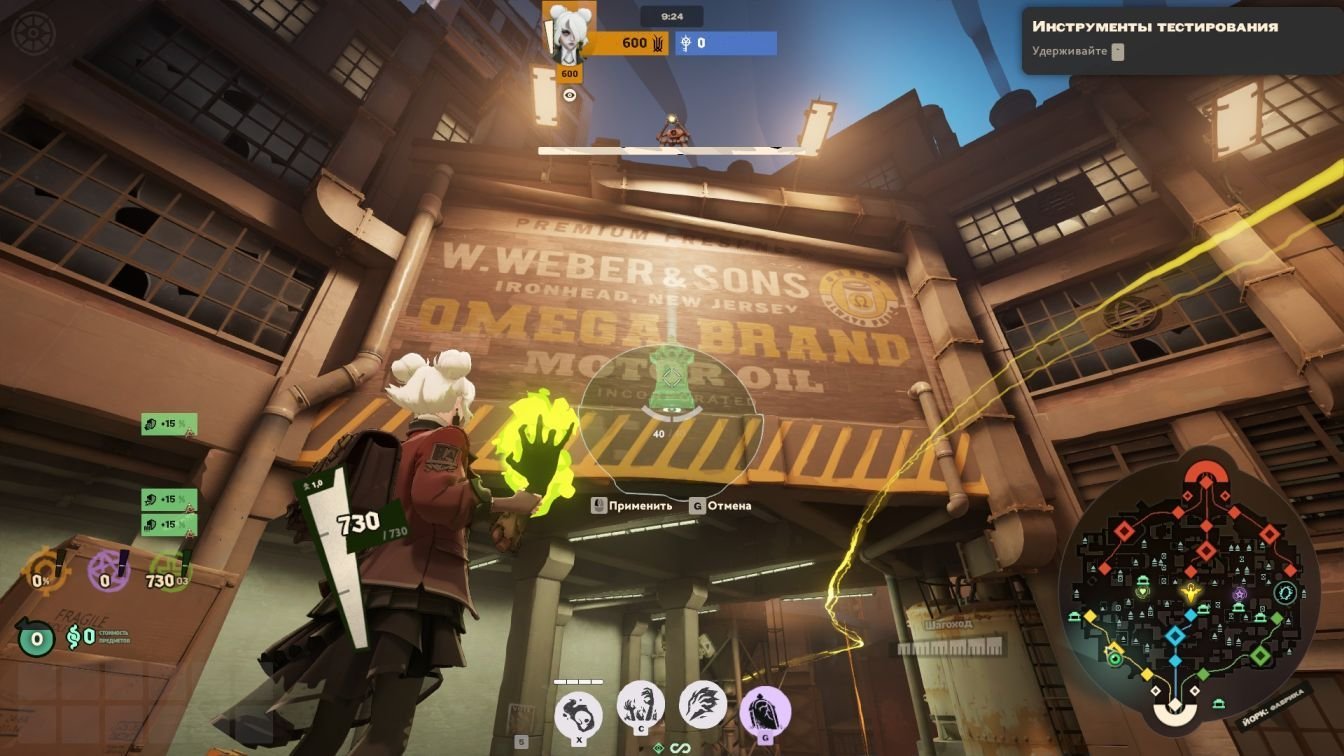
Archmother Graves
Guardian Tomb — Archmother
Walker Tomb — Archmother
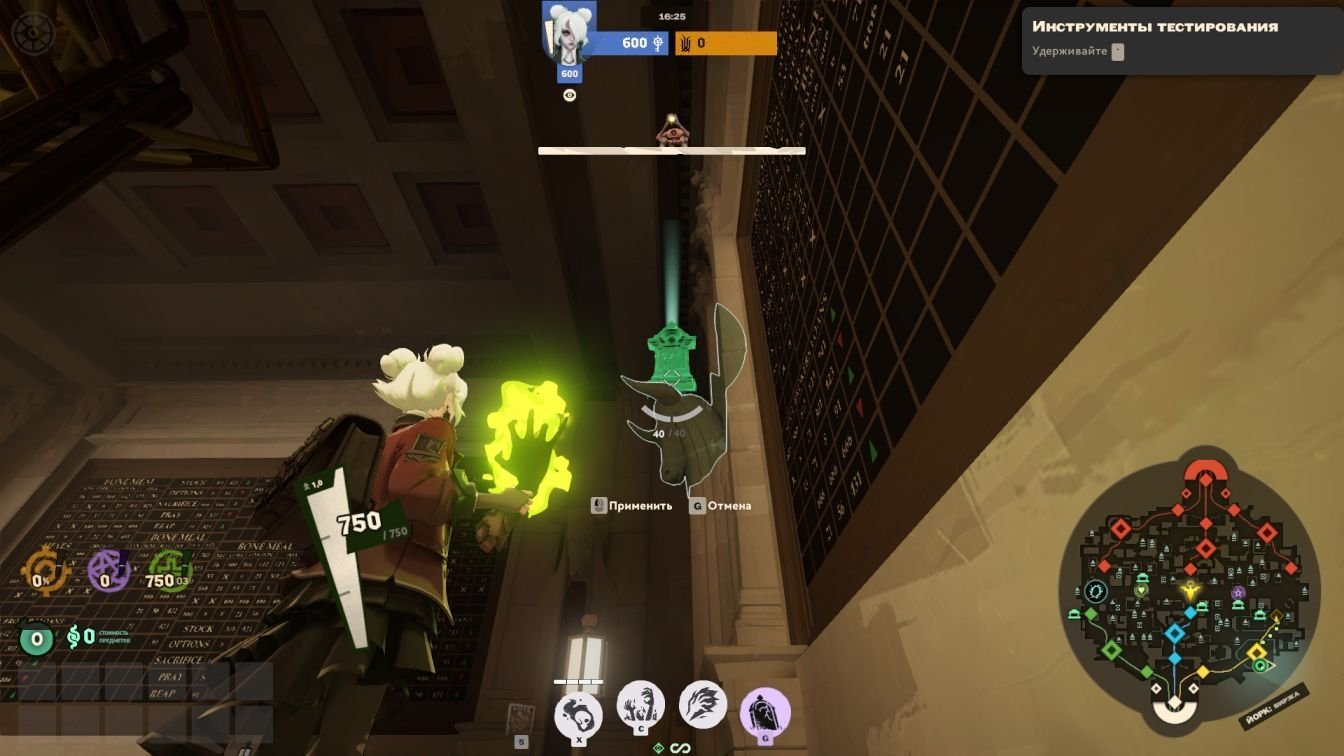
Universal Guardian Tomb Spot
Finally, we have Broadway, where you can find reliable spots for both factions. You might need to think creatively on some of these.
Guardian Tomb — Hidden King
Walker Tomb — Hidden King
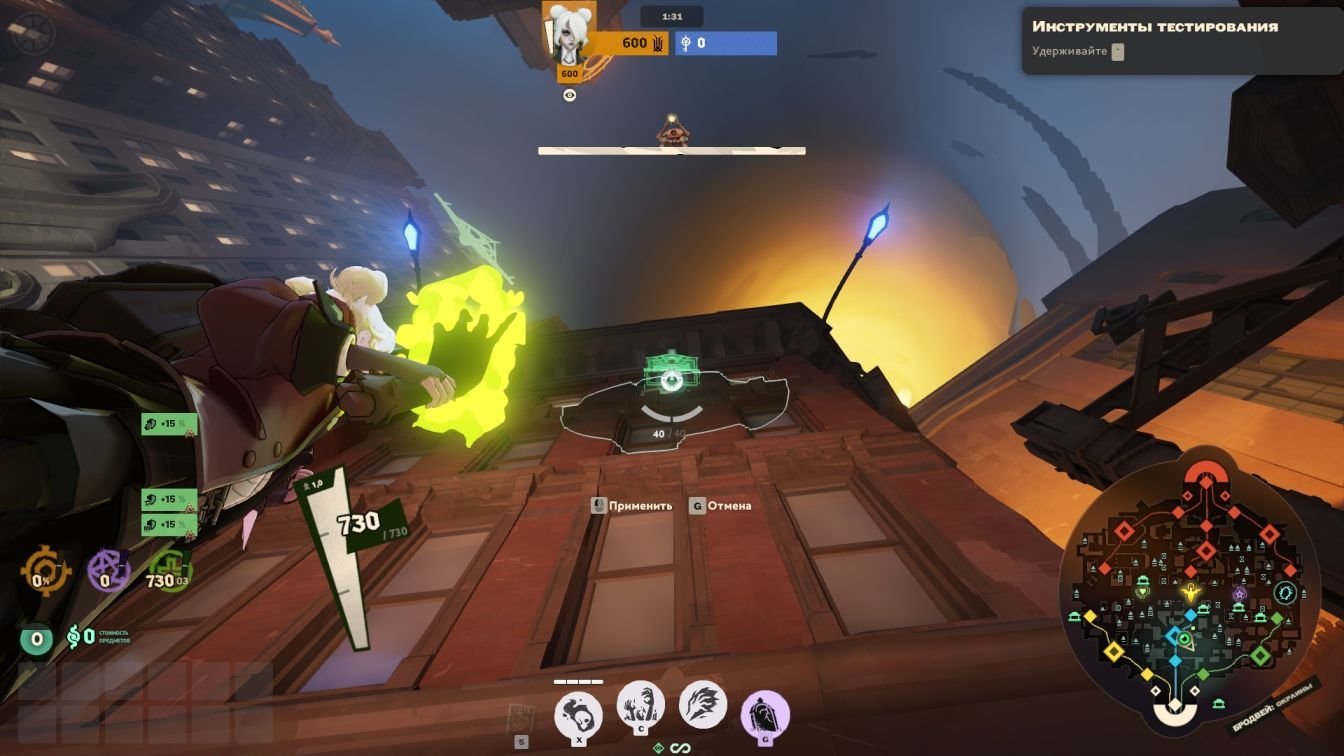
Guardian Tomb — Archmother
Walker Tomb — Archmother
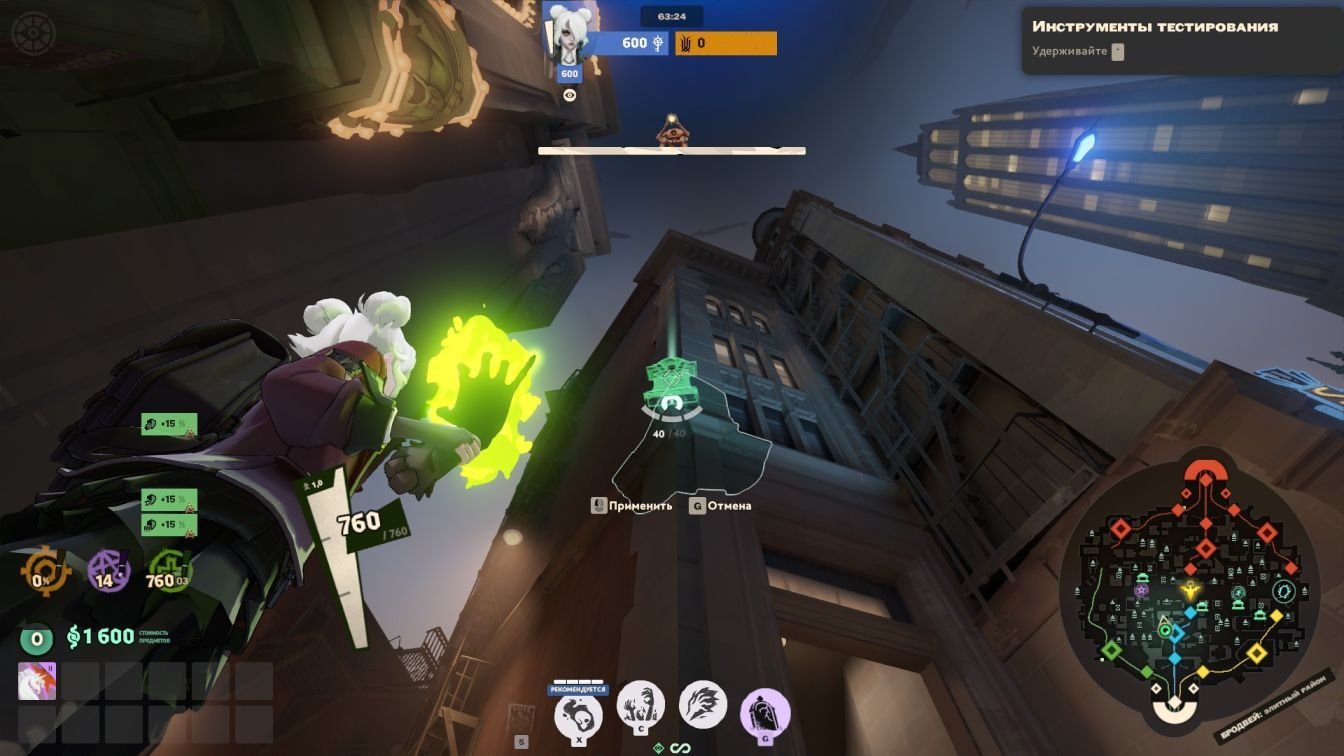
Remember, you’re not limited to the spots listed here. Explore nearby buildings, windows, and trees to discover additional placements to conceal your Graves. Many ledges can work in your favor, so try different approaches to secure them out of enemy reach.
Your primary aim is to make enemies use extra time reaching your Grave. A smartly placed spot that forces a difficult approach can be far more effective than one that’s visible and accessible. Always check that the Grave settles where you want it before leaving it unattended!
Before using any spot in a match, check that the Grave settles on the intended surface and that enemies cannot reach it with a simple jump.