In Moon Sweepers, the biggest limitation you’ll encounter is the conveyor belt system. With only 12 connections possible at a single base, making each connection count is crucial. My compact production setup is designed to maximize that efficiency and keep your production line running smoothly.
As you dive into building your factory, you’ll find that many players get tripped up by trying to design larger, more complex systems instead of focusing on optimizing what they have. Trust me, understanding the conveyor belt limit transforms your gameplay and resource management.
If you’re just starting out, think about what you’ll need. Grab the right materials, plan for your production line layout, and you’ll be off to a great start!
Conveyor Belt Optimization Guide
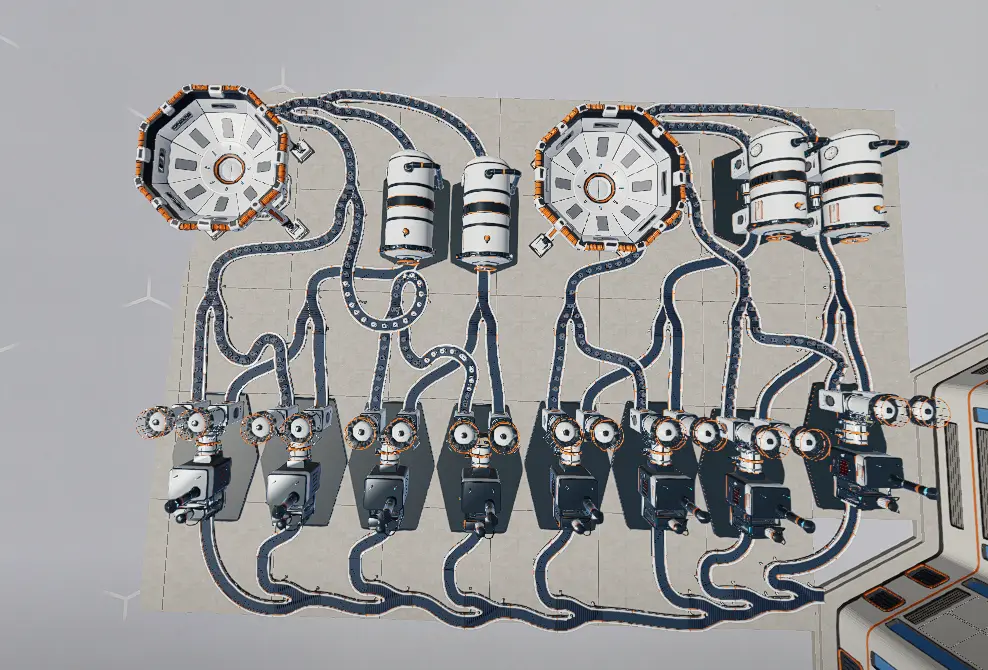
My go-to production line is a 2-4-8 setup that employs Capsule Catchers, Pressure Chambers, and Stone Presses. This design maintains a compact layout while efficiently utilizing the input and output conveyors available to you.
Understanding the Conveyor Belt Limit
The main bottleneck you’ll face in Moon Sweepers comes from the 12-conveyor limit per base. Rather than simply adding more conveyors, optimizing your production is the key to success.
Maximizing the load on your input and output conveyors is crucial for achieving the best efficiency with the connections you have available.
To get the most from your setup, focus on using the full potential of both your inputs and outputs.
My Compact and Efficient Production Setup
This setup is straightforward and doesn’t require any convoluted connections. Here’s how I line everything up:
- 2 Capsule Catchers
- 4 Pressure Chambers
- 8 Stone Presses
With eight Stone Presses in action, this design turns the conveyor belt into the limiting factor. This is exactly what I aim for because it ensures I fully utilize the conveyor capacity.
Early-Game Setup and Garage Connection
In the early game, you can implement this same production line, just on a smaller scale. It’s a great way to begin your operation before you expand to the full 2-4-8 setup.
Another hint: connect your production line to the garage. Just remember to keep both the input and output conveyors well-utilized.
Late-Game Maximum Efficiency Build
When you reach the late game, switching to the full production layout allows for maximum conveyor efficiency. Ensuring that both input and output conveyors run at peak capacity is essential for making the most of your connections.
Adding Solar Panels is a smart move for boosting your energy production in this setup. Here’s what my maximum-efficiency production layout looks like:
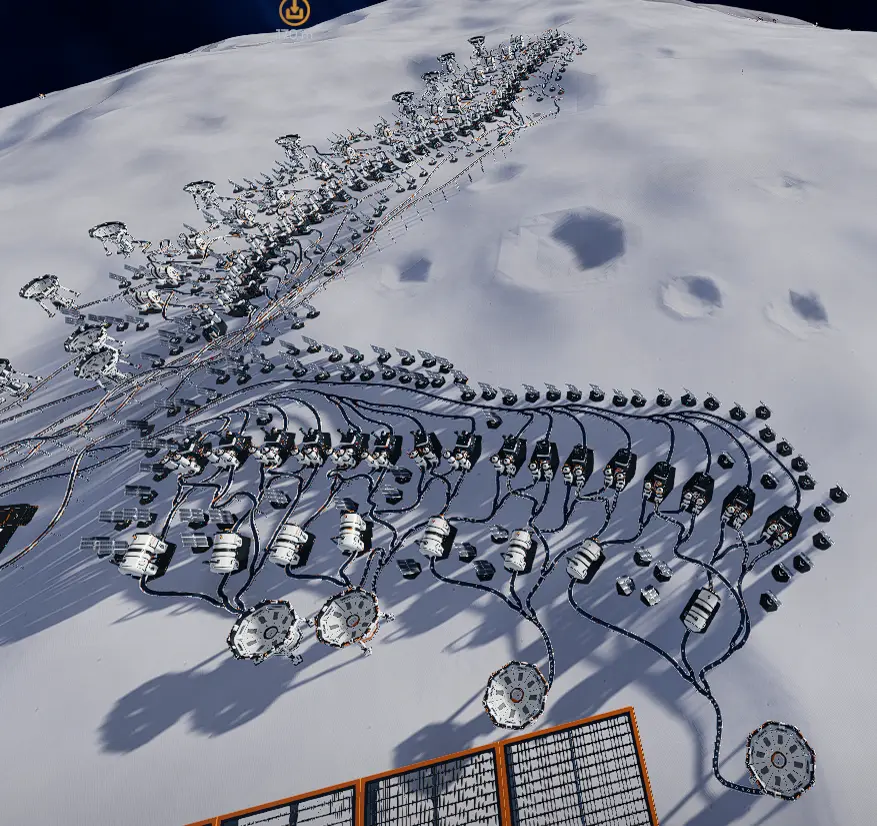
In Moon Sweepers, the key to an effective factory is mastering the 12-conveyor limit. This compact 2-4-8 setup allows you to maximize the utility of your conveyor resources, and starting with a smaller version can ease the transition to a fully functional late-game production line.